I was actually quite worried about this post. After taking lots and lots of step by step pictures for this tutorial, I came to the conclusion that I might be violating some sort of blogger (a.k.a me) - reader (you, of course) unwritten rule. I counted and I originally came up with 29 pictures.

Yep, 29. I mean, should I post all or cut try to cut it down? If I post all, I have a feeling you'll just be bored and completely stop reading. Or if I try to cut it down, I might be excluding something that could be important. After all, this is a life changing post. What could be more important than learning how I make Avenger Cupcakes? Do tell :)

Anyway, thank heavens for techie friends who suggested I use the Frame Maker App which can combine several pictures into one thereby lessening the chances of me boring the living daylights out of you. Yey!

I have been waiting for the movie to come out since last year. After totally enjoying watching Iron Man and Captain America (yeah, I missed Thor and Hulk), I wondered how they would come together as a team. It definitely is an interesting mix.
So here it is, guys! Here's a cutie-fied version of the Avengers. I made them cute because they are all soo serious in saving the world, I thought it couldn't hurt if somewhere in the blogosphere, there exists their happy, cute as can be alteregos. But before that, here's a before and after.
See these fondant round cut-outs (4 flesh colored, one electric green and one super red)? They'll be transformed from this -

To this! Ta-daahhh! And I am going to show you how. Let's start?

The Avengers Cupcakes
What We Need:
Fondant in black, while, flesh, royal blue, red, electric green, ivory, orange and two shades or purple
Rolling pin
Small scissors
Luster dust in silver and gold
Fondant cutters - heart in 2 sizes, circle in 2 sizes, rose petal, 6 petal flower cutter
Fondant ball tool (the green stick thingie on the picture)
#7 small round tip
Tappit alplabet for letters A and H (Optional)
Extra small pink heart sprinkles (Optional)
Small white round sprinkles 

Avenger #1: Captain America (Steve Rogers)

Here's How:
(1) Roll out flesh fondant. Cut out a circle using the smaller round cutter.
(1) Roll out flesh fondant. Cut out a circle using the smaller round cutter.
(2) Roll royal blue fondant. Using the larger fondant cutter, cut out a circle. This will be Captain America's mask. To complete it, using the 6 petal flower cutter, cut a small portion to give way to his nose and lips. Use the #7 small round tip to cut two holes to give way to his eyes. Widen it with the ball tool. Attach the mask to Captain America's face.
(3) Roll out white fondant, cut out a small heart, divide into two and fashion it as wings to both sides of his mask.
(4) Use the Tappit to cut out an "A". Or, if you don't have a tappit, just roll the white fondant and shape to an "A". Attach to the center of Captain America's mask.
(5) Half press the #7 small round tip to produce a smile on his face.
(6) Finish with the details on the eyes.
Avenger #2: Iron Man (Tony Stark)

Here's How:
(1) Roll out red fondant. Cut out a circle using the larger round cutter.
(1) Roll out red fondant. Cut out a circle using the larger round cutter.
(2) Roll out ivory fondant. Cut out a circle using the smaller round cutter.
(3) Using the heart cutter, cut out small triangle on top head of the ivory fondant.
(3) Using the smaller circle, cut out a small portion of both cheeks.
(4) Brush it with gold luster dust.
(5) Attach gold part to the center of the red fondant.
(6) Finish with the details - eyes and lips.
Avenger #3: Black Widow (Natasha Romanoff)

Here's How:
(1) Roll out flesh fondant. Cut out a circle using the smaller round cutter.
(1) Roll out flesh fondant. Cut out a circle using the smaller round cutter.
(2) Roll orange fondant into a cylinder and curl to shape Black Widow's hair.
(3) Attach a small round flesh fondant to serve as her nose.
(4) Paste a pink heart sprinkle as her lips
(5) Finish with the details - eyes
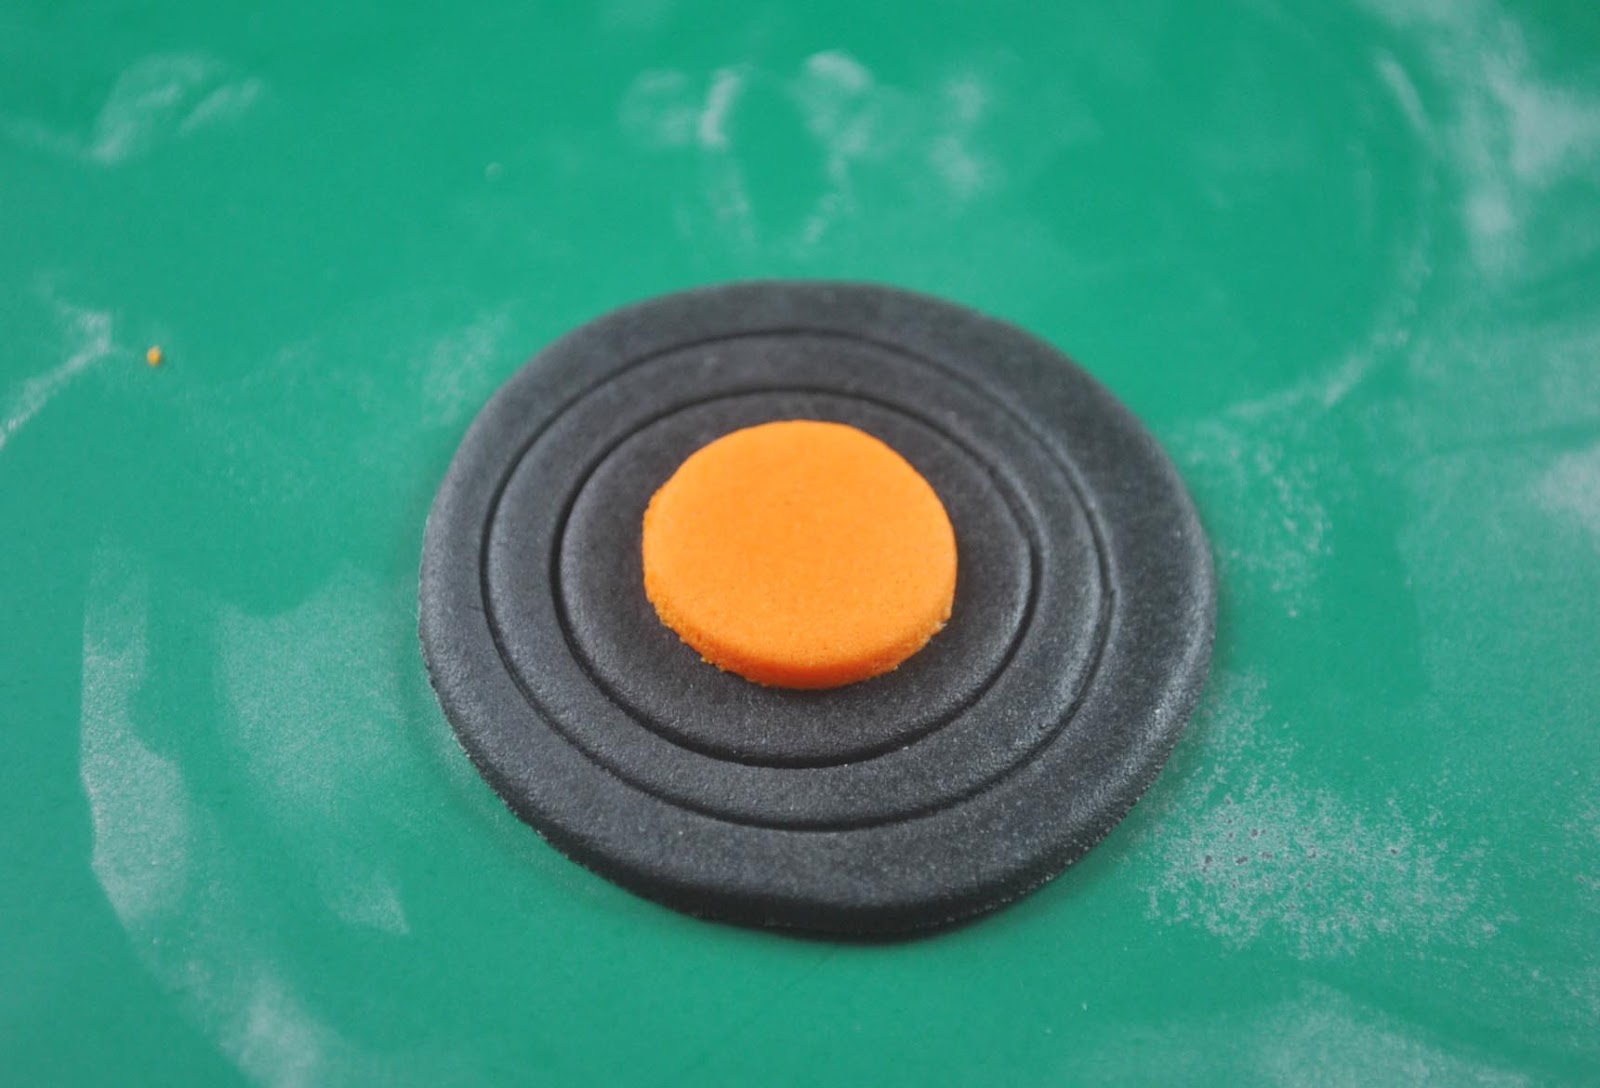
Avenger #4: Hulk (Bruce Banner)

Here's How:
(1) Roll out green fondant. Cut out a circle using the smaller round cutter.
(1) Roll out green fondant. Cut out a circle using the smaller round cutter.
(2) For his hair, to achieve the disheveled look, roll black fondant into a cylinder. Using the small scissors, "cut" "large" "strip" of hair in disarray.
(3) Attach a bog round green fondant to serve as his nose.
(4) Finish with the details - eyes and lips
Avenger #5: Thor (a.k.a Thor)

Here's How:
(1) Roll out flesh fondant. Cut out a circle using the smaller round cutter.
(1) Roll out flesh fondant. Cut out a circle using the smaller round cutter.
(2) Roll white fondant. Using the larger fondant cutter, cut out a circle. This will be Thor's helmet. To complete it, using the 6 petal flower cutter, cut a large to give way to his eyes.
(3) Again roll out white fondant, cut out 2 rose petals and fashion it as wings to both sides of his helmet. Cut out a strip and attach to the center of this helmet
(4) Brush all of the helmet with silver luster dust.
(5) Half press the #7 small round tip to produce a smile on his face. Attach a small round flesh fondant to serve as his nose.
(6) Finish with the details on the eyes.
Avenger #6: Hawkeye (a.k.a Clint Barton)
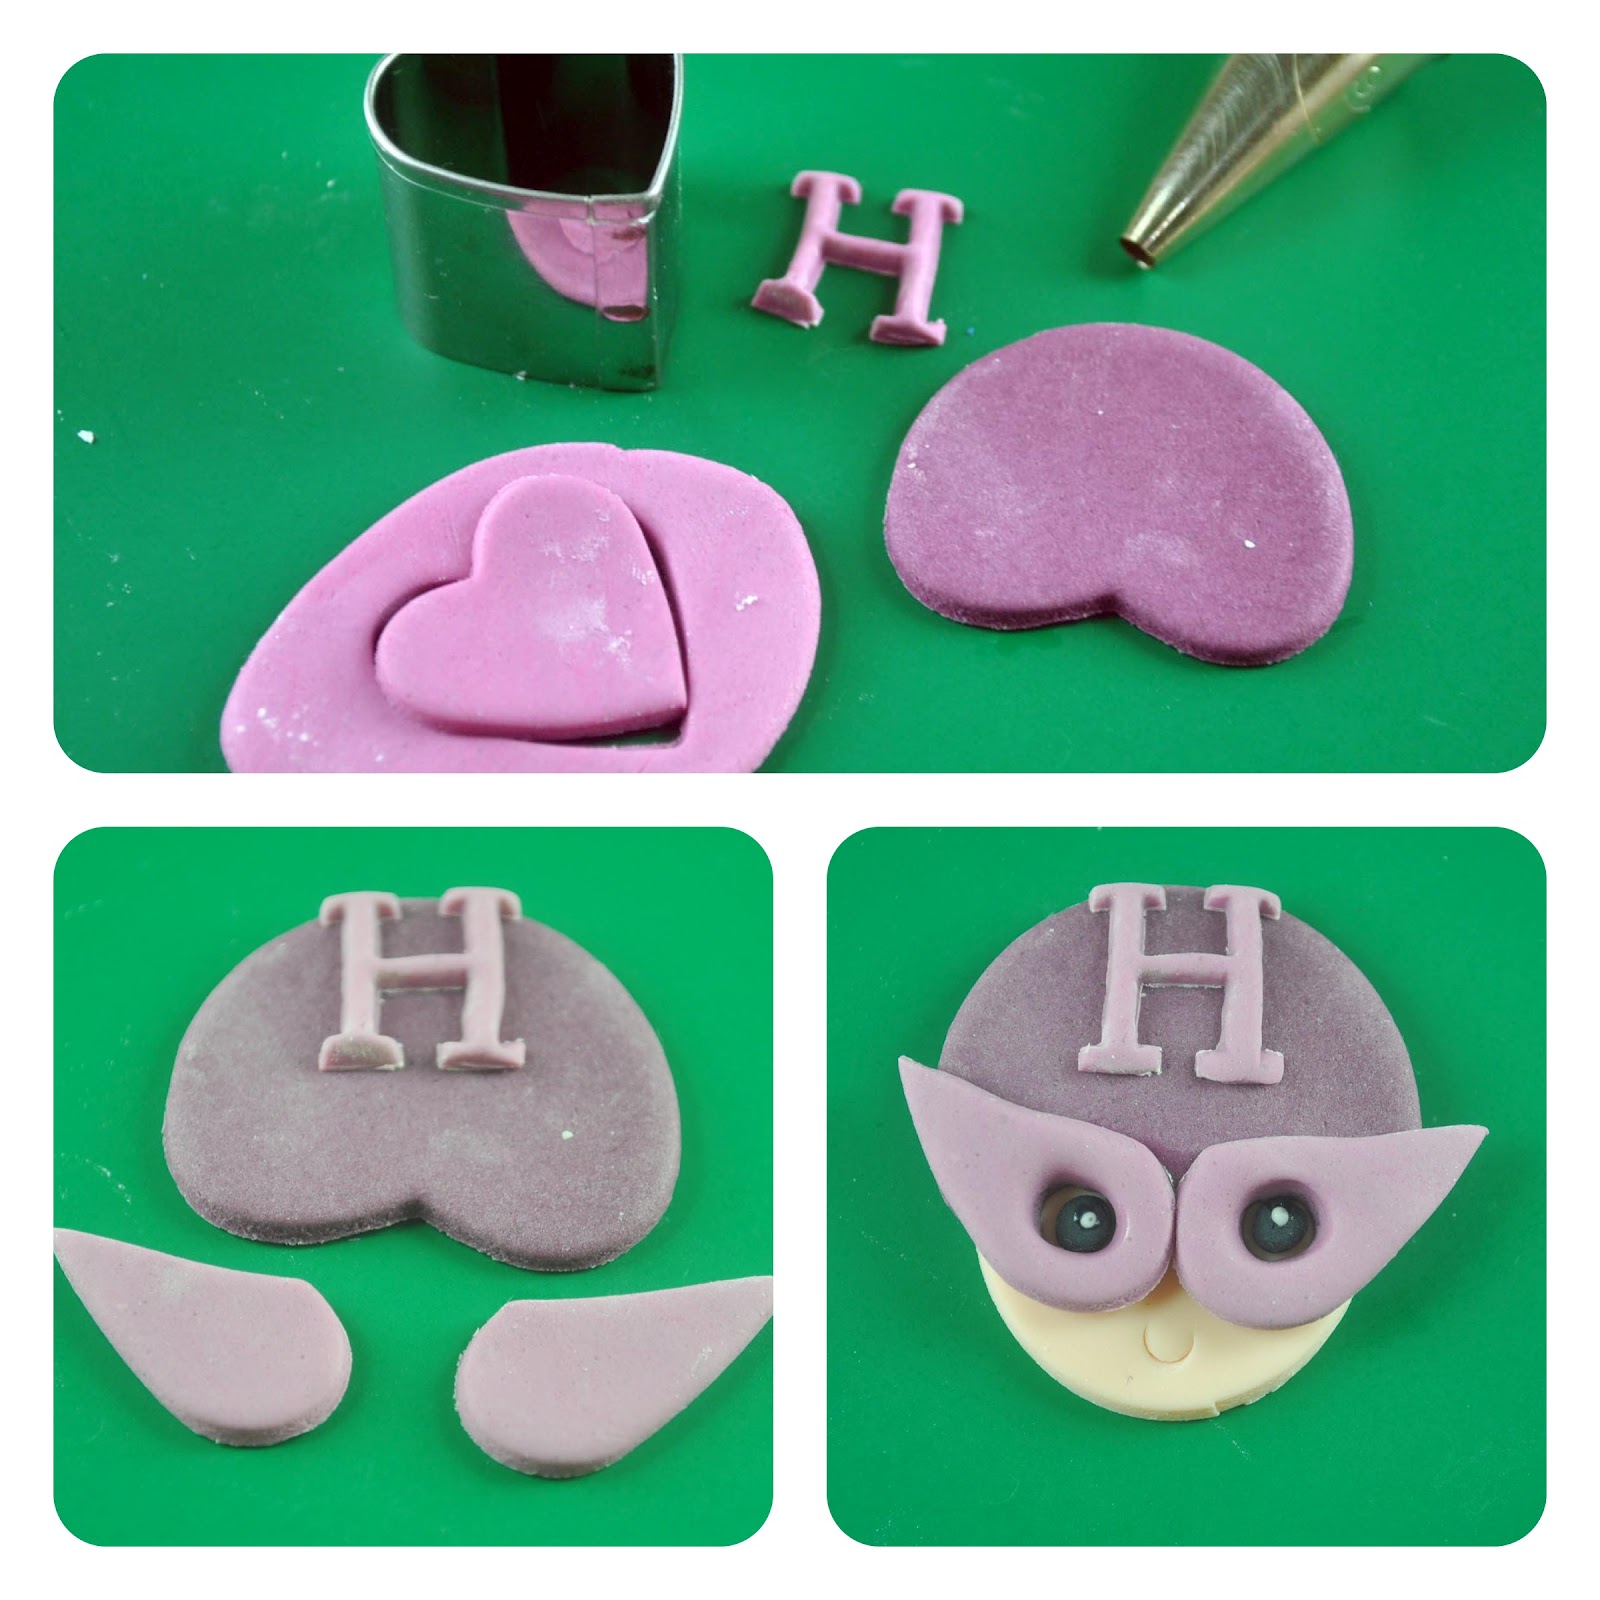
Here's How:
(1) Roll out flesh fondant. Cut out a circle using the smaller round cutter.
(1) Roll out flesh fondant. Cut out a circle using the smaller round cutter.
(2) Roll darker shade of purple fondant. Using the larger fondant cutter, cut out a circle. This will be Hawkeye's mask. To complete it, using the 6 petal flower cutter, cut a small portion to give way to his lips.
(3) Roll out lighter shade of purple, cut out a heart, divide into two and fashion it as a cover to his eyes. Use the #7 small round tip to cut two holes to give way to his eyes. Widen it with the ball tool. Attach the mask to Hawkeye's face.
(4) Use the Tappit to cut out an "H". Or, if you don't have a tappit, just roll the white fondant and shape to an "H". Attach to the center of his mask.
(5) Half press the #7 small round tip to produce a smile on his face. Attach a small round flesh fondant to serve as his nose.
(6) Finish with the details on the eyes.

From 29 pictures, I was able to cut it down to an acceptable (I think) 14. Whew! Hope you enjoyed the tutorial as much as I had fun making it! Till next time! :) And, relax, life is short, enjoy the rest of the week, see a movie.
Love,
Aikko