Tampilkan postingan dengan label cupcake toppers. Tampilkan semua postingan

Selasa, 08 Januari 2013

How to Make Boat Cupcakes


Last Christmas, I was on this island. Perfect bliss. 
I think I am in a long dream right now then I'll wake up and I'm back there - listening to the waves, sipping my choco peanut butter shake and reading a book. And no, no zip lining or cliff diving for this baker. Vacation is best enjoyed laid back.
Yeah, definitely I am still on beach mode. So I thought if I can't go the beach, I'll bring the beach here, at home - stat. Somehow.  
How about some boat cupcakes? Anyone? We're keeping the tutorial pretty simple. At least for this post. I know we're still on vacation mode so I'm kind of hoping, like me, you're taking it easy.

Ready?
How to Make Fondant  or Gumpaste Boat (2D Version)

What we need:
Fondant in several colors (I used purple, green, pink, yellow and blue)
Square fondant cutter
Round fondant cutter
Knife
Rolling pin
Water and brush
Stitching tool (optional)
Here's how:
(1) Roll out green fondant, cut circles then cut it into half.
(2) Roll small blue fondants into balls and glue into the green fondant.
(3) Cut out triangles from the pink and yellow fondant.
(4) Roll out purple fondant thickly. And cut out squares then run the stitching tool through the edges. The purple fondant will serve as the blank canvas where well arrange the boat like so.
Use the water and brush to adhere the boat parts to the purple blank canvas. 
Now, our boat cupcakes are ready for use :)
Hope you like it guys! :)


Minggu, 09 September 2012

How to Make Plants vs Zombies Cupcakes - Sunflower (4 of 5)


Related posts:


Me: When I was a kid...
You: oh it's one of those posts where Aikko reminisces
Me: This is not a long one, unlike this really long story
You: Yeah that was a long one
Me: I just need an intro for this post, pretty please?
You: Oh, alright then, go ahead.
Me: Ahemmm...

Okay, (still me), when I was a kid, we lived in a province north of Manila, the place is kind of remote and the mode of transportation were tricycles which were hard to come since there were just a few. And when we need to go to town we'd have to wait for one. And sometimes, it was reaaallllly long wait so I have to amuse myself playing with Makahiya (or as they call it, Bashful Mimosa), go ahead and touch it and it will close up on you but opens up again when you're not looking. Nothing dangerous, just little plants that are just so abundant there. 

But in the summer it gets really interesting, my Ma would plant sunflowers in our front yard and I would just love to look at how it adores (I mean) follows the sun. Don't you love sunflowers? It's my favorite because if happiness were a plant, it would be just that - sunflower.

And so, for the fourth installment of our Plants vs Zombies Cupcakes, we're making the sunflower plant.  Wanna start?
What we need:
Fondant in mint green, brown, yellow and black

Flower cutter
Green drinking straw
Small leaf cutter
Knife
Rolling pin
White sprinkles
Brush and water 
 Here's How:
(1) Roll yellow fondant thinly and cut out 2 flowers
 (2) Put them one on top of the other, press the center down. 
 (3) Roll brown fondant into a ball and flatten on top of the flower.
 (4) Add eyes.
(5) Add more details into the face, add sparkle into the eyes and a wide smile. Roll out mint green fondant. Cut out three leaves. Using the knife, press steam details onto the leaves. Attach green drinking straw into the flower. Make sure the green drinking straw is long enough to stick into the cupcake all the way to the bottom
 (6) To assemble, stick flower into the cupcake then add the leaves.
 I am saving the scariest for last. Zombie cupcakes, coming to you screens real soon!

Selasa, 28 Agustus 2012

How to Make Safari Cupcakes - Fondant Monkeys


When I was a kid, I badly wanted a monkey for a pet. But I guess that really won't work as we lived in a small apartment then, no space really for a monkey to run around freely and definitely no branches for the cute one to hang on. And so my sister and I got a poodle named Sunshine. One look at her and I forgot I  wanted a monkey for a pet. She was a ray of sunshine really. 
As a continuation of the Safari Themed Tutorial, we're making fondant monkeys today. We already did Ms Ellie the Elephant here. I'm thinking we'll follow that up with cute monkeys today.  
What we need - 

Fondant in brown, flesh, white and black
Fondant tools
White small sprinkles
Brush and water

Here's  how:
(1) Roll brown fondant into a ball, press it flat.
(2) Roll small flesh fondant into an oval shape, press it flat and paste to the monkey's face.
(3) Using pointed fondant tools, add the nose and cute mouth.
(4) Roll small white fondant for the eyes
(5) Roll even smaller black fondant, paste it to the eyes then add white sprinkles.
(5) For the ears, roll two tear shaped brown fondant
(6) Press a ball tool into the wider end.
(7) Attach ears to the monkey's head
Along with the elephant cupcakes, these monkey cupcakes are perfect for baptism, birthday parties and any other celebration you can imagine :)
Hope you like it my dear Bake Happy friends! Till our next tutorial!


Rabu, 18 Juli 2012

How to Make Safari Cupcakes - Fondant Elephants


So here's the deal. I need you to sit down. 

Take a deep breath. 

Prepare yourself. 

What I am about to tell you is of utmost importance. 
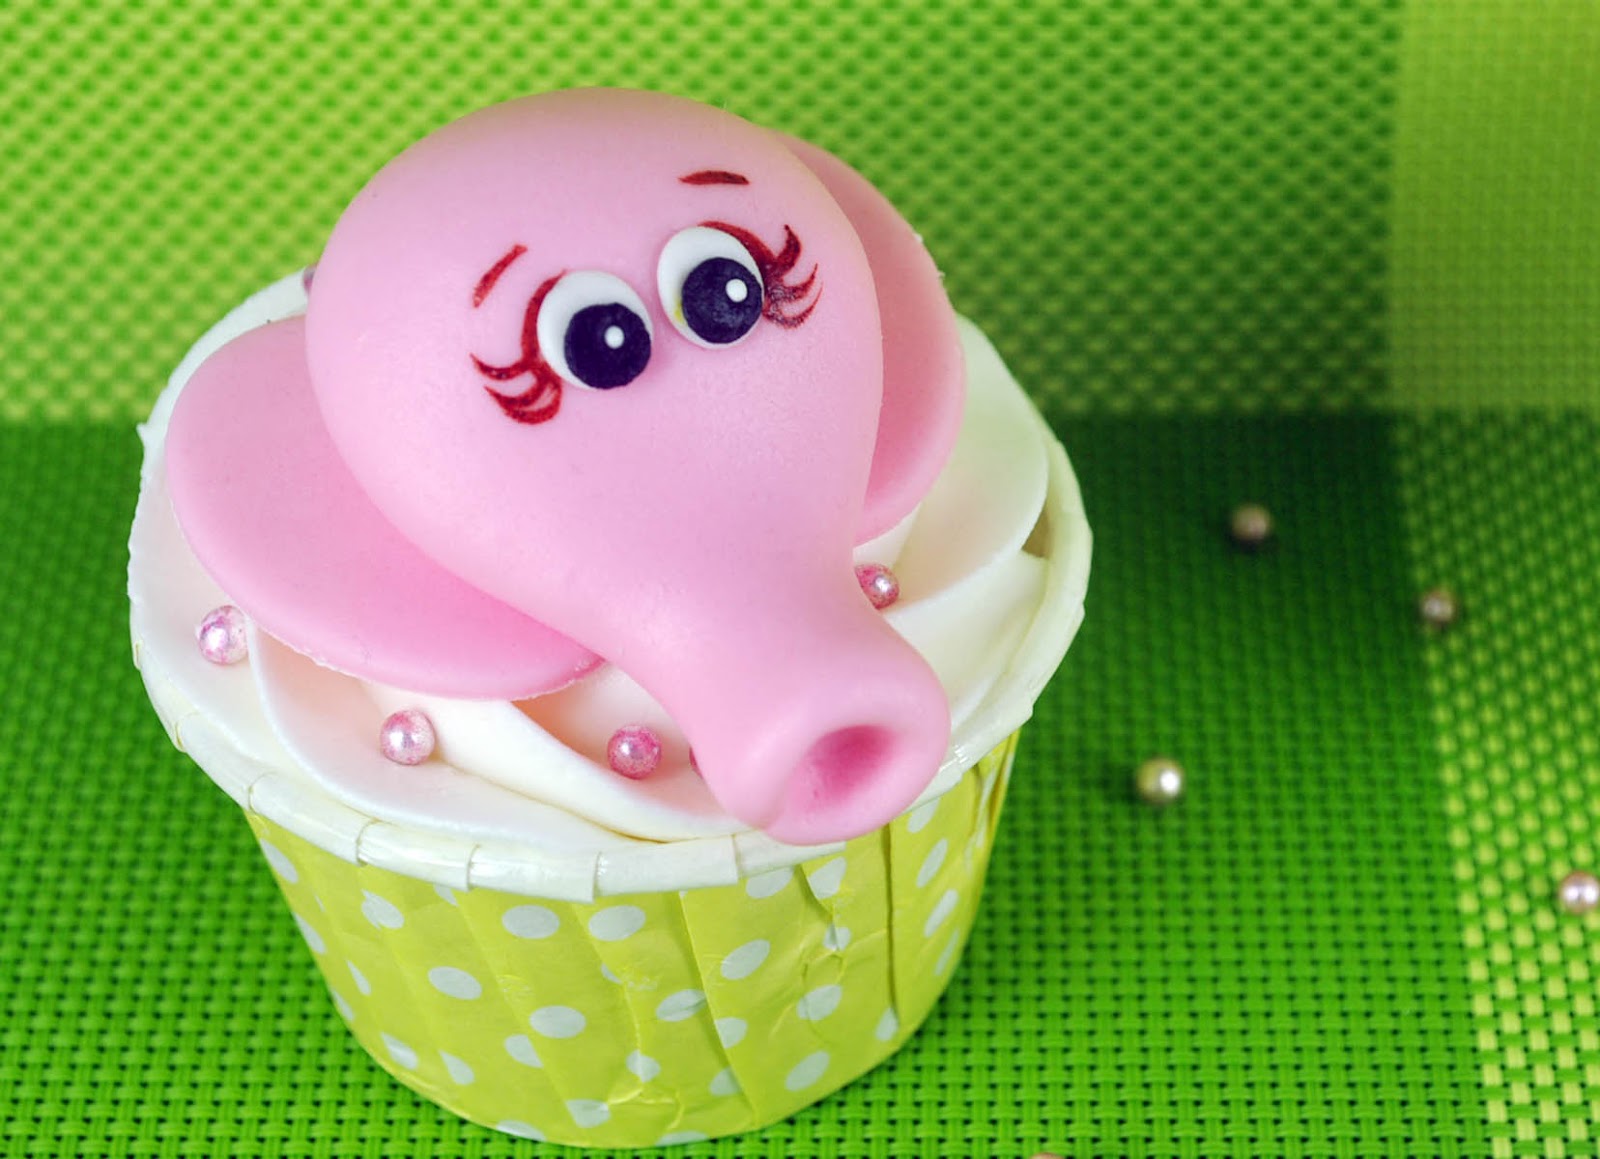
In this day and age, it is important to once in a while drop whatever your doing and de-stress. Read a book, take a stroll in the park, have dinner with friends. Or de-stress by staring, oohh-ing and ahh-ing at the cuteness of this Elephant Cupcake. I call her Ms Ellie. Ms Ellie the Elephant with the longest lashes ever (I'm jealous) 

As you can see, I am making this into a series - The Safari Themed Cupcakes Series and I am going to show you how I'll make them. Pefect to make for kids or with kids, birthday parties, baptism, and  every occasion imaginable. First up, Ms Ellie the Elephant Cupcakes.

What we need - 

Fondant in pink, white and black
Fondant ball tool
Rolling Pin
White small sprinkles

Oval fondant cutter (medium)
Brown gel food coloring
Brush and water

Here's How
(1) Roll pink fondant thinly and cut oval shapes for Ms Ellie's ears

 (2) For Ms Ellie's head and trunk, roll fondant into a ball
(3) Press one side down.
(4) Then roll back and forth.
(5) Using the fondant  ball tool, press the end of Ms Ellie's trunk inward to create a cavity.
(5) Roll small two white fondant pieces into balls and press into Ms Ellie's head
(6) Do the same for the black fondant and add the white sprinkles into Ms Ellie's eyes.
(7) Add the eye details, brows and girly girl lashes and attach the ears.
Hope you liked the tutorial! :)
For more tutorials, see here: http://bakehappy.blogspot.com/p/tutorials.html 
Have a great day everyone! :)


Rabu, 11 Juli 2012

How to Make Barrel Handbag Cupcakes


Related posts:

You do know that I have a thing for crime procedural dramas, right? There's NCIS (the orginal one), then there's Bones, then there's Warehouse 13. Warehouse 13 isn't really a crime procedural drama but I so love the steampunkish vibe the show has so I watch it as well. But right now... I am totally obsessed with Castle. Castle and  Beckett, otherwise known by the portmanteau: Caskett, haha!

Ahh Castle... I am officially counting the hours until the weekend when I can focus on watching the season 4 marathon.  So probably on Monday, my rant would be "I can't wait for September to kick off the first episode for season 5". 

But right now, I can totally sense you pressuring me to go on with the show... I mean, go on with the tutorial. After all, I did promise one more bag tutorial before I move on to other equally (if not even more) exciting things right? 
So here I am, being such a nice and accommodating blogger, I made another a fondant bag cupcake topper tutorial just for you (read: that's another way of saying: Help!!! I can't stop making these fashionista themed toppers! They just look sooo cute!)
What we need - 

Fondant in teal, white and gray

Stitching tool (or toothpick or knife)
Silver dragees
Silver Luster Dust (optional)
Silicon button design mold (optional)Knife 
Brush and water
Here's How
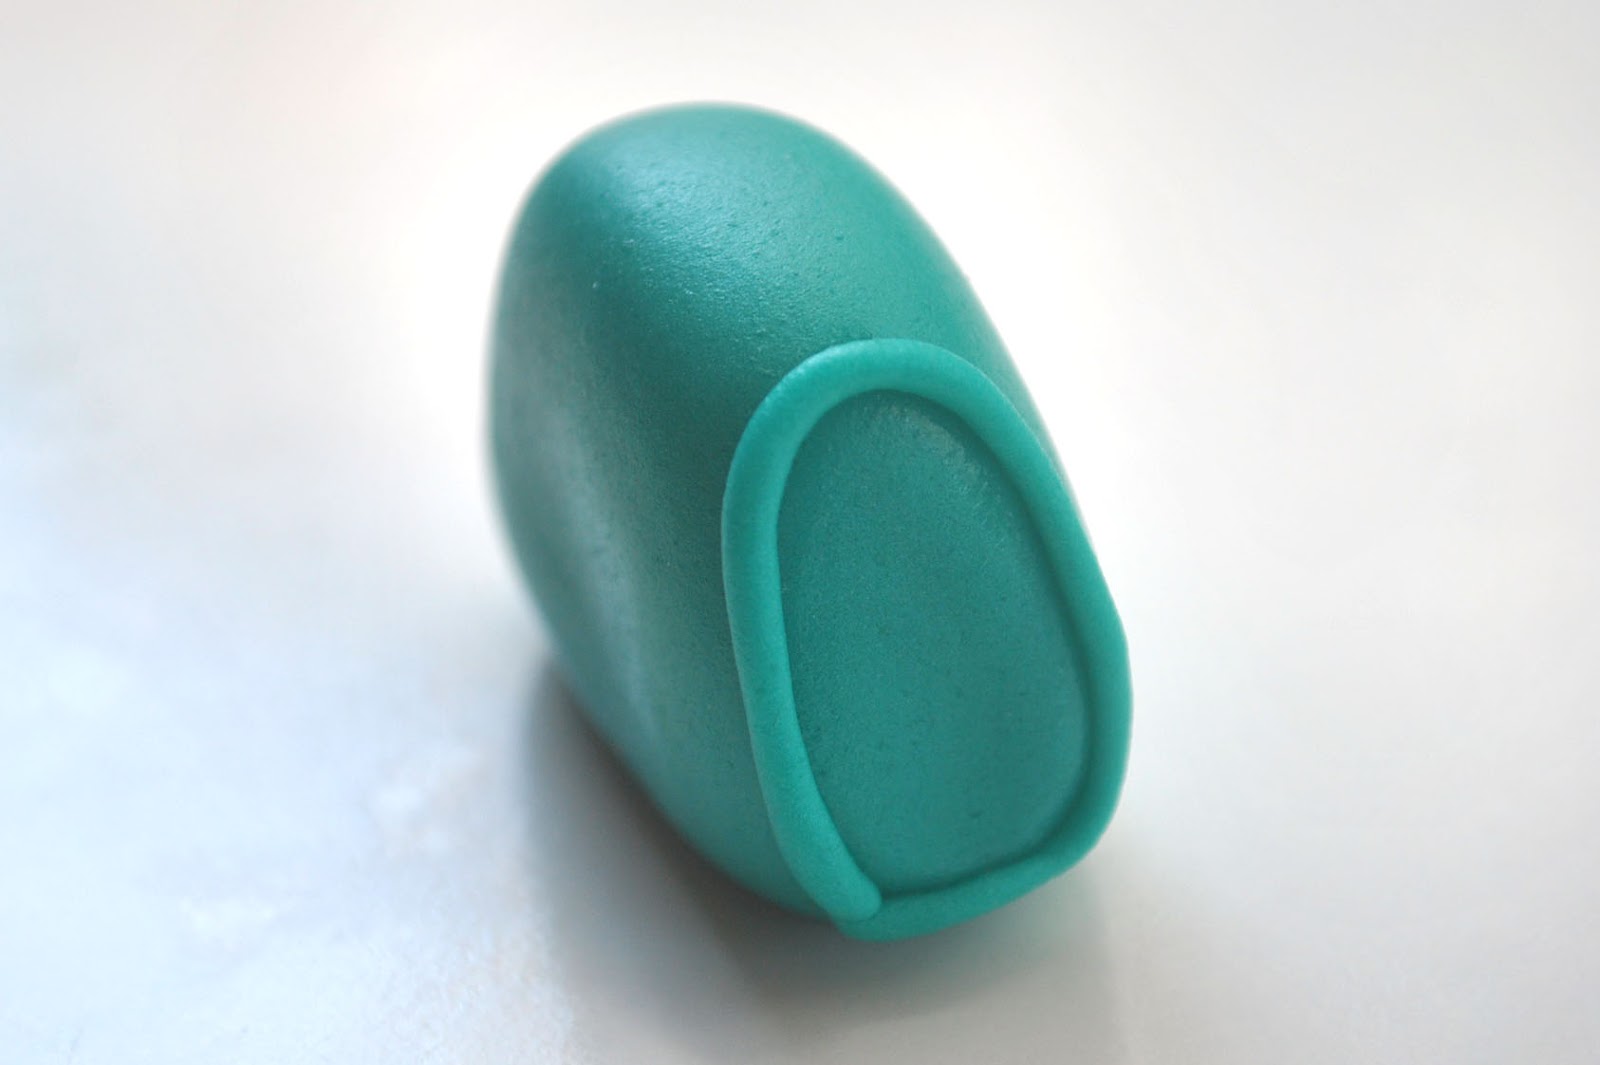
(1) Roll fondant into a ball
(2) Flatten the ball using the palm of your hand
(3) Let the flattened ball "stand up" and press down top part
(4) Ahem... please pardon my un-manicured nails. Sometimes, there are more important things to do in life than having your nails pampered... like making a Barrel Handbag Cupcake Topper. 
Oops, I digress... using your thumb (manicured or unmanicured is fine :)) and index finger, press the flattened ball together then press again this time in a downward direction. This will give the bag a stable base to stand on.
(5) Roll remaining fondant into a rope
(6) Attach the fondant rope to both the side edges of the bag
(7) Make a zipper by rolling the white fondant, cut a slim rectangular strip.The using a knife, press a zipper design onto the fondant.
(8) Attach to the bag.
(9) Now now now, this part is optional since silicon molds are not always available. For this bag, looking at it right now, it just looks plain/bare. By having a focal point, it'll lively things up, hence the silicon molds. If you don't have the silicon molds, you can cut out a small fondant flower or a simple fondant rose and it will do just fine as well. 
If you happen to have the silicon molds, here's how I did it. Press a small amount of the gray fondant into one of the molds then unmold.
(10) Brush with the silver luster dust for added sheen. Set aside.
(11) Remember the ropes in step #5? Cut them up in uniform length
(12) Attach them as handles of the bag. Paste the button at the center of the bag.
(13) Secure the handle onto the bag by attaching silver dragees to each end and pressing it inwards.
There you have it folks!  Another designer bag, fondant version. 
For more fondant bag tutorial, do visit some of my previous posts:
How to Make Fondant Designer Bag Cupcake ToppersHow to Make a Designer Red Purse Fondant Cupcake TopperAnd if you visit Bake Happy's Facebook page 's Photo Album, there's even one extra speedy tutorial there  :)