Selasa, 30 Oktober 2012

How to Make Witch's Hat Cupcakes


Whenever I hear the word "witch" I will always remember a girl named Caroline Pearce whom Jessica and Elizabeth Wakefield suspected to be a witch back in second grade. Oh I do hope you know what I am talking about. It's book #33 on the Sweet Valley Kids series way back when... ummm.... hmmm... let's see... okay.. when I was young. There, I said it. :) 
So, for my dear Bake Happy readers who are younger (or older) and just can't relate, Sweet Valley is this series of books about twins Jessica and Elizabeth Wakefield  who looks exactly the same but are different as night and day when it comes to their personalities. To cater to kids/teens of different ages, there are the Sweet Valley Kids, Sweet Valley Twins and Sweet Valley High books. My sister and I were into the Sweet Valley Kids series and every Saturday, we get to buy two from the series for 54 pesos at the National Bookstore in Harrison Plaza. These are the books that got me started on reading books and the culprit to me wearing ridiculously thick and heavy glasses up to now. 
I can't remember now how the story ended, (of course, Caroline is not a witch) but I remember there were chanting ("double double toil and trouble"), spells, toads (?), cauldrons and of course hats. Witches' hats. And here I am, so into the Halloween spirit, showing you how to make it in fondant. 
Fondant Witch's Hat Tutorial

What we need:
Fondant in purple, orange and green
Round fondant cutter
Knife
Water and brush to glue things together
Here's how:
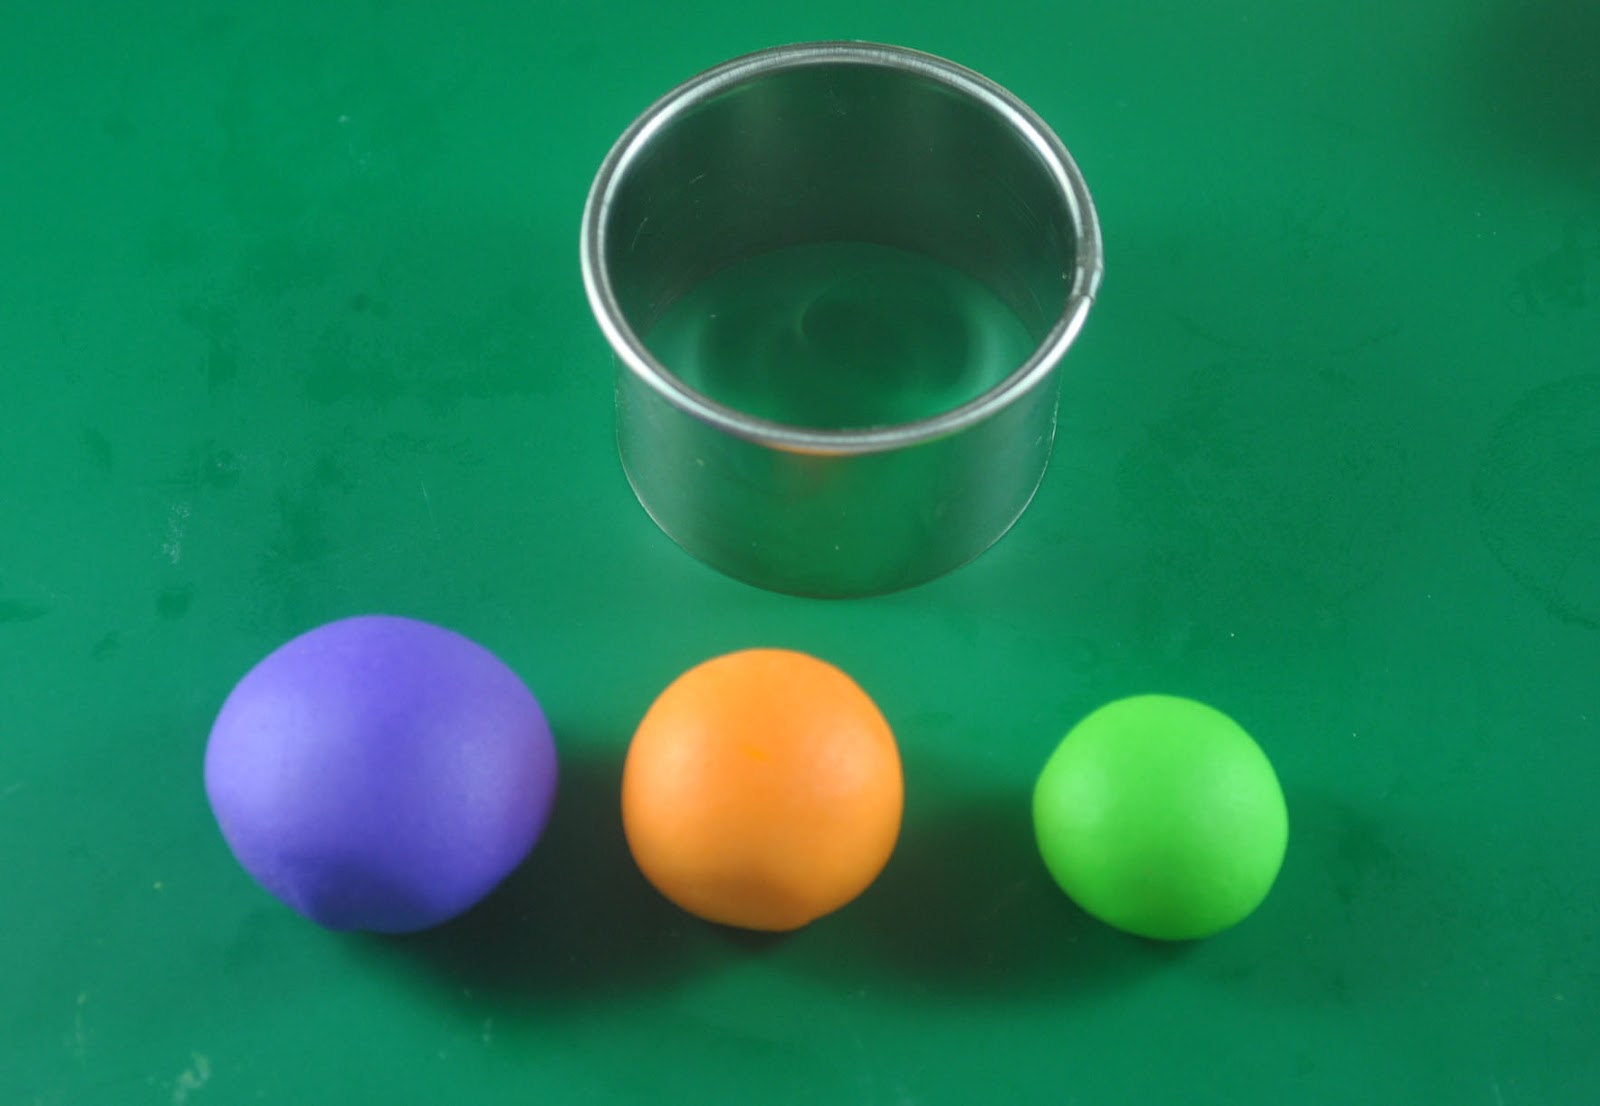
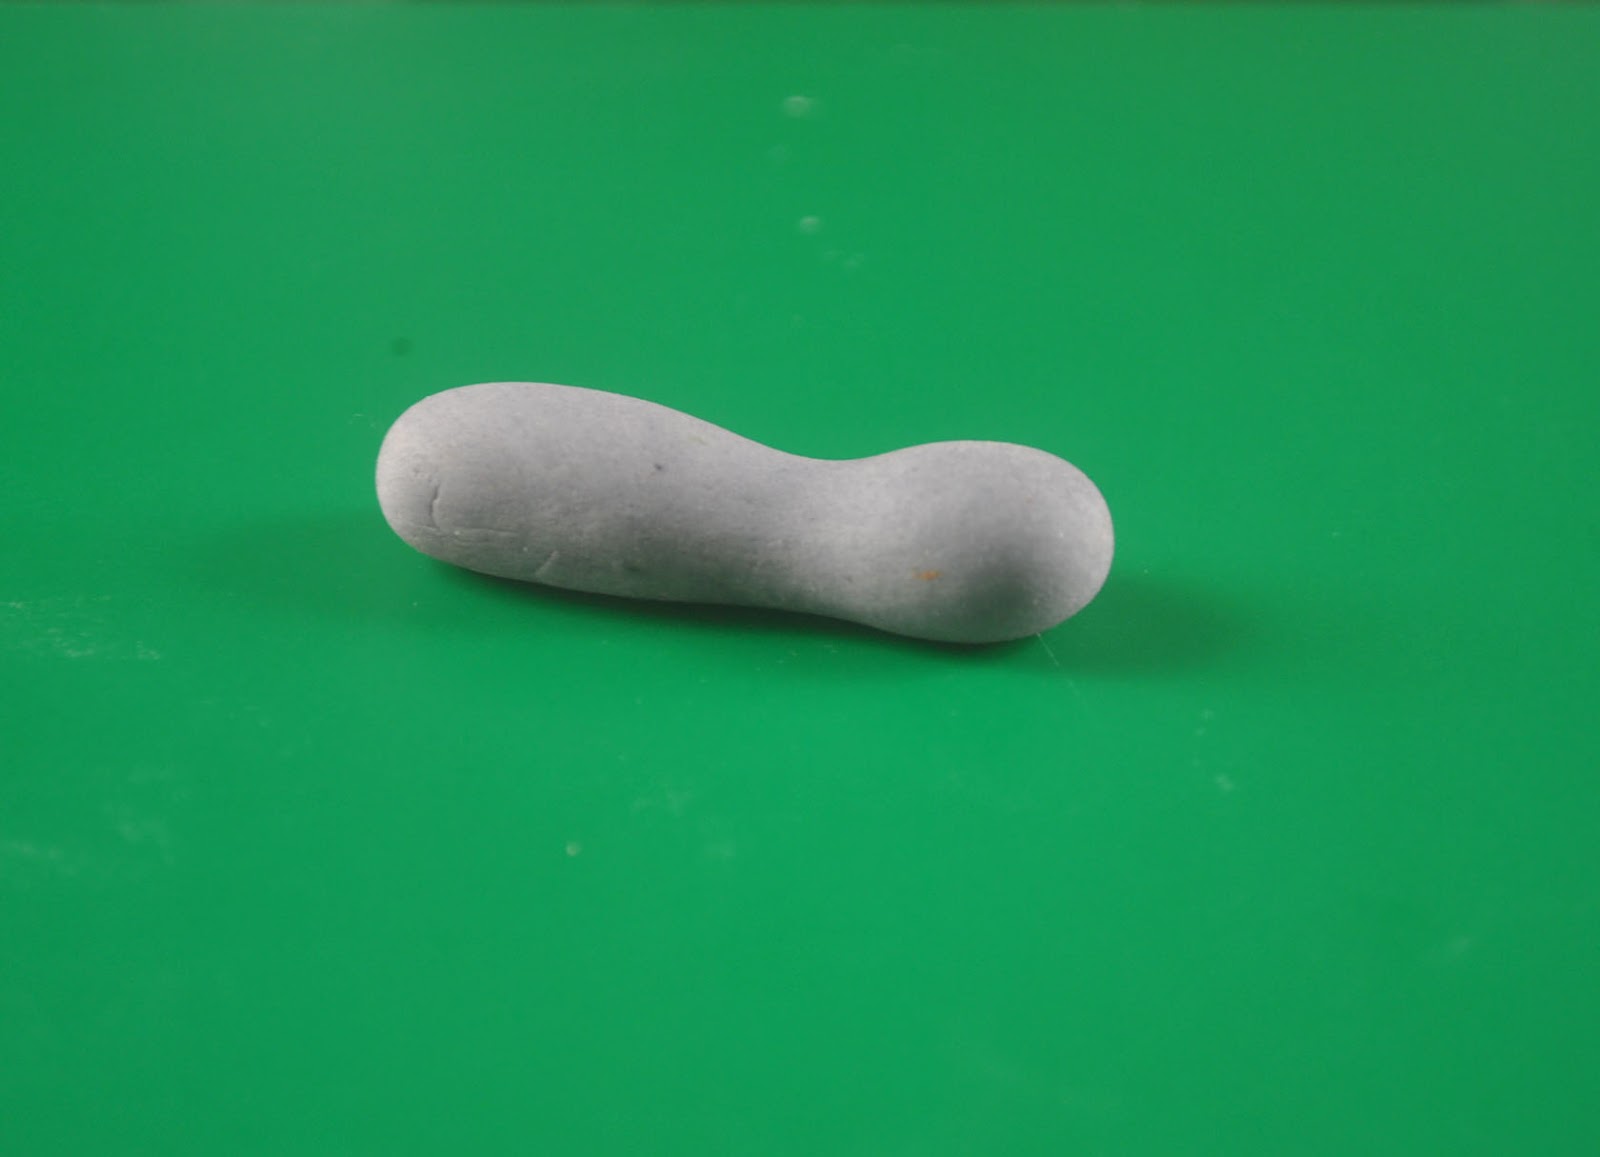
(1) Roll purple fondant thinly and cut out round shapes. Set aside
 (2) Go get a big chunk of purple fondant, shape it into a tear. 
 (3) Flatten the base.
 (4) Cut some orange fondant strips
 (5) Assemble the hat
 (6) Paste the orange strip into the base of the hat
 (7) Using the green fondant, add some buckle design. 
 Happy Halloween everyone! :)


Sabtu, 27 Oktober 2012

How to Make "I'll Be Right Back" Cupcakes


There are a few things I think I know about zombies - 
  • They're dead but are somehow brought back to life probably by some magical powers
  • They may be feeding on human flesh, whether the human will turn into a zombie too... that I do not know but I'm guessing I am confusing that with the human-turning-into-vampire rules.   
  • And please let's not get into what they could probably smell like (come on, food blog here)
 
Anyway, I plan to educate myself on all things zombies as History Channel will be showing the Zombies: A Living History documentary on October 31st. 

In the meantime, here is my interpretation on how zombies are born, cupcake style. 
"I'll Be Right Back" Cupcakes

What we need: 
Fondant in white and gray
Oval fondant cutter
Rolling pin
Knife
Toothpicks
Graham crackers, crushed
Optional to write "brb"
     - tappits and brown fondant (what I used)
     - royal icing or
     - edible pen
Here's how:
(1) Roll white fondant thickly and cut out oval shapes
(2) Cut out one end flat
(3) Paste on or write the BRB sign. You can also write RIP or SYS (but See You Soon is really creepy, so let's not write that, okay?) BRB seems to be most fitting since the zombies really will be right back.
 (4) As for the hands, go get some gray fondant. Roll flesh fondant into a cylinder
 (5) Press one end (leaving just a small part) back and forth to create a dent all around 
 (6) Flatten smaller end
 (7) Cut a "v" using a knife to separate the thumb from the other zombie fingers
 (8) Run a knife through the hand to create the other zombie fingers
 (9) Rub the fingers together. No need to be prefect here, this is a zombie hand, the more gruesome, the better
 (10) Press the knife into the fingers to create some knuckes
 (12) Press tip of the knife to the tip of the zombie fingers to create the nails.
 (13) To assemble, ice a cupcake. It's okay not to use a piping tip, just use the good ole spatula. 
 (14) Dunk into a plateful of crushed graham crackers, using a toothpick for support, add the "BRB" sign and the zombie hand coming into the land of the living for the first time. 
Can you see the zombie at the back (on the right)? I think he just realized he was buried in a cupcake so he's kind of feeling his surroundings. :)

Have a happy Halloween everyone!

Minggu, 21 Oktober 2012

Carrot Cake Recipe


There are many things you can do to try to get to sleep.
Let's see...
- count sheep 
- drink a glass of milk 
- read a book 
- turn the lights off

Or if none of these work, try getting out of the comfy bed and so something productive - like baking a carrot cake (and cupcakes).
Which was what I did one morning when I found myself unable to visit dreamland at 5:30 am. 
And since it's five thirty in the morning, it's really too early to go get the mixer running. It's really neighbor friendly to use the good old fashioned whisk. We don't want them angrily knocking on our doors do we? But then again, if you can't resist using a mixer, go give some carrot cake as a peace offering :)

Another friendly advice, while it's okay to use the whisk for the cake, the frosting is all together another story - a mixer is a must. By the time you cooled the cupcakes and start preparing the frosting, the rooster must have already "cock-a-doodle-doo-ed" signaling everyone's awake so it's okay to use the mixer. 

Auntie Fely's Carrot Cake Recipe
Makes 1 6 inch cake and 6 cupcakes
350F

What we need:

2 cups all purpose flour
2 teaspoons baking powder
2 teaspoons cinnamon
1 tsp salt (yeah one whole teaspoon - I can't believe at first but it actually works with the recipe :) )
1 1/2 cups canola oil
2 cups sugar
4 eggs
3 cups grated carrots
1/2 chopped nuts (I used cashew)
Here's how:
(1) Sift or dry whisk all dry ingrdients (flour, baking powder, cinnamon, salt). Set aside.
(2) Whisk together oil and sugar.
(3) Add the eggs one at a time.
(4) Add the dry ingredients little by little.

This is how it will look it once the dry ingredients are all in.
(5) Mix in the grated carrots.
(6) Then the nuts. Oh and before I forget, make sure to toast the nuts first before using them to give them a nuttier flavor.
(7) Using the batter, I baked 6 cupcakes (3 of which didn't even make it to the photoshoot) for 15 minutes and a 6 inch cake (baked in two pans) for 40 minutes.
Carrot cake goes well with cream cheese frosting (we don't have it any other way, do we?) and so I whipped some from this recipe.

Senin, 15 Oktober 2012

How to Make Fondant Starfish Cupcake Toppers


Please.... pretty please? Please tell me somewhere on earth it is summer. 
Because if there is no one (absolutely no one) is spending summer fun in October then you probably think I am weird. Yeah, weird in a sense that instead of posting something Halloween related, here I am posting a tutorial on summer themed cupcakes - how to make starfish cupcakes. 

Talk about taking the road less traveled :) But if you're waiting for some Halloween themed ideas, don't worry, there will be some. But for now, let's re-live the glory days of summer by making these starfish cupcakes. 
Fondant or Gumpaste Starfish Tutorial

What we need
Fondant in orange (or any other color you want your starfish to be), white and black
Rolling pin
Star shaped fondant cutters
Small piping tip #4
Water and brush to glue things together
Here's how:
(1) Roll orange fondant thickly, cut out stars using the fondant cutter
(2) Press circles on top to create texture on Mr Starfish
Here is how they will look like. Not to worry if the "star shape" was not retained during the process. It'll come together later.
(3) Flip Mr Starfish over and lightly press a knife from the corners to the center. But just a bit,okay?
(4) Curl each ray (the "legs" of the starfish) together.
(5) Now, flip Mr Starfish over again. As you can see, he looks kind of flat. So go ahead and get some more orange fondant, fashion it into a ball.
(6) And paste it under the center of Mr Starfish.
(7) Lastly, add the eyes.
So, are we okay celebrating summer in October? :)