Jumat, 16 Desember 2011

Chocolate Almond Torte

Every year, I promise myself to shop for Christmas presents early so I won't join other Christmas shoppers' hustle and bustle. But then again, things come up left and right and Christmas shopping always gets done the last minute. But then again, again, it won't be Christmas if there's no Christmas shopping rush! 
To help celebrate the holiday rush, can I interest you in eating a slice of Chocolate Almond Torte? Dense, chocolatey and nutty. Every bite will surely start a symphony of chewy, chunky and chocolatey goodness. Maybe I'll just share a slice with you, I'll save the rest for me... kidding!
Martha's recipe calls for pistachios but I still have a lot lonely looking almonds begging for my attention so I used them for this recipe instead. 
Chocolate Almond Torte
350 degrees/60 to 70 minutes
Adapted from MarthaStewart.com

Ingredients

For The Cake
1/2 cup (1 stick) unsalted butter, cut into small pieces
1 cup all-purpose flour
1/2 teaspoon salt
1/4 teaspoon baking powder
8 ounces semisweet chocolate, coarsely chopped
1 1/4 cups sugar
1 teaspoon pure vanilla extract
2 large eggs
1/2 cup low-fat buttermilk
3/4 cup shelled, unsalted almonds, coarsely chopped

For The Chocolate Ganache And Topping
1/2 cup heavy cream
4 ounces semisweet chocolate, coarsely chopped
1/4 cup shelled unsalted almonds, coarsely chopped
Directions:


To make the cake:
(1) Line 8-inch round cake pan with parchment or waxed paper. In a medium bowl, whisk together flour, salt, and baking powder. Set aside.
(2) In a large heatproof bowl set over (not in) a saucepan of simmering water, melt butter and chocolate, stirring frequently, 4 to 5 minutes. Remove bowl from pan.
(3) Whisk in sugar and vanilla, then eggs, buttermilk, and almonds. 


(4) Fold in flour mixture just until combined. Pour batter into prepared pan. 
(5) Bake until a toothpick inserted in center comes out with a few moist crumbs attached, 60 to 70 minutes. Let cool in pan 5 minutes; run a knife around edge, and invert onto a wire rack. Remove paper, and let cool completely, about 3 hours. (To store, wrap in plastic, and keep at room temperature, up to 3 days).
To make the ganache:
In a small saucepan, bring cream to a simmer; remove from heat. Add chocolate, and let stand 5 minutes; whisk until smooth. Let cool until mixture falls back in ribbons when lifted with a spoon, 2 to 6 minutes.
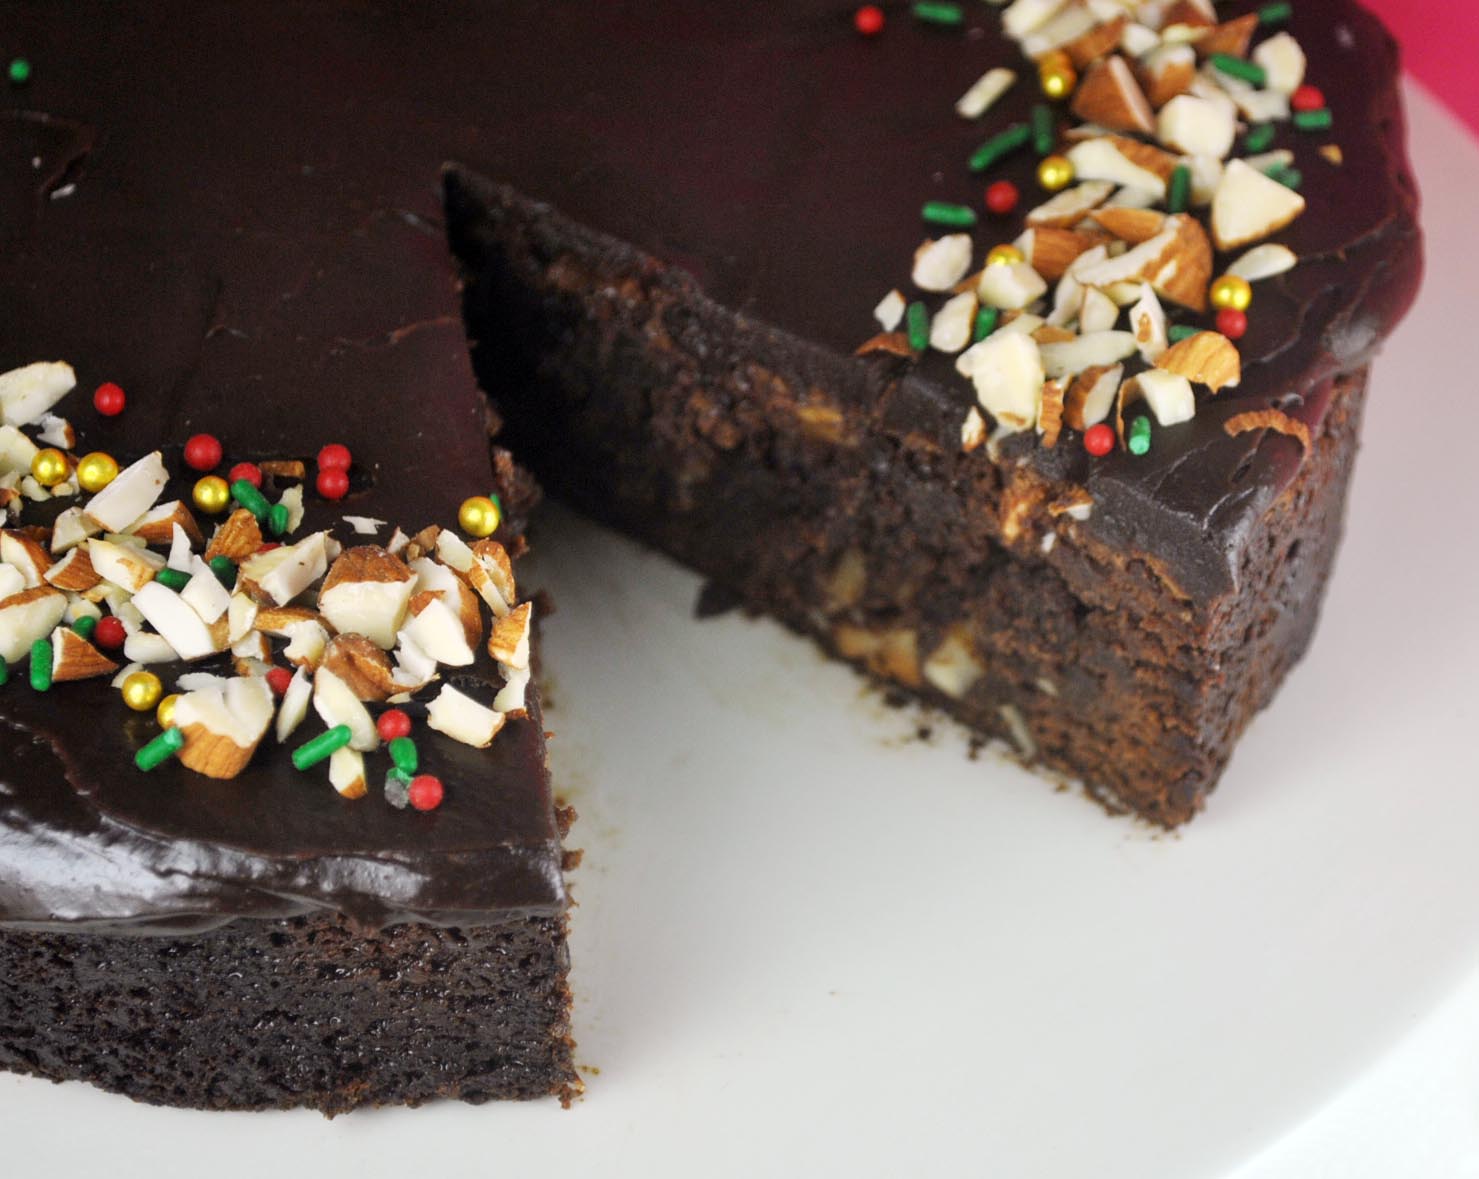
Spread ganache over the top of the cake. Decorate the cake with almonds and for the Chrismassy feel, sprinkle the cake with red and green sprinkles. For added sparkle, add some gold dragees too :)


Minggu, 11 Desember 2011

How to Make a Fondant Dress Topper (and an early greeting)


Wow! How time flies, it's just 13 days before Christmas. If you ask me, I don't know how that happened. It still feels like July to me, except that everywhere you look there is proof that it is indeed December. 


So for my first post for the merry month, I'm going to show you how to make a simple dress topper then let's see where that'll take us. 
 What we need:


Fondant in black and white
Rolling pin
Heart fondant cutter
Polvoron Shaper or Round fondant cutter
Yellow Sprinkles
Royal Icing or water (to paste sprinkles to the dress)

Here's how:
(1) Roll out black then white fondant. Cut out the small heart from the white fondant, then cut out the round polvoron shaper (or round cutter) from the black fondant.
 (2) Remove bottom part of the heart, this will give the top of the dress the sweetheart cut.
 (3) Divide black fondant into two, with one part more than the other. This will be the skirt part of the dress.
 (4) Position the white fondant on the top part of the black fondant.
 (4) Cut out the sides  of the black fondant using the white fondant as a guide as to where to cut. And just like that we know have a simple dress cupcake topper. Easy huh? :)
We can then jazz it up a bit (and hide the line that divides the top from the bottom part of the dress) by adding some yellow sprinkles (to serve as a belt) with the help of some water or royal icing. 
And now that we know the basics, the possibilities are endless! Here are some of what I came up wtih. 


I went to Gourdo's a few months back and saw these dessert designs on sale. I didn't know what I would like to with them then, they just look so pretty not to be bought. So glad I did.
They are like stickers, only that they're edible. Just remove the design from the paper and place it in your cake/cupcake using water as glue. Pretty simple, yeah?
 Pink, white and black looks like a good color combination. 
 In one design, I used the pink design on top, and on another, I used it on the skirt. Then I used royal icing to make the belts of the dresses.
Remember this post of Salvacion Lim Higgins' Iconic Terno made into a cookie? I can not get enough of Slim's designs. They transcend time, such a classic works of art. 
And when I say, I can not get enough of her designs, I made cutie-fied versions of two of her dresses. You remember the terno of course and a flowy blue and yellow dress. 
And since where on - 
(a) the subject of dresses
and
(b) it seems Christmas is just around the corner...


why not make a dress for Mrs Santa?
 Okay, make that two dresses for Mrs Santa. Here's another dress with a pencil cut skirt.
 Hope the Mrs would love these.
And so, as the post title says... here's an early Christmas greeting from Bake Happy!


Kamis, 24 November 2011

Bake Happy's Got a New Look!


I have been meaning to give my little corner in the blogosphere a facelift for sometime now. It took me too long enough since I wanted to be sure I reached out to the right designer who'd be able to help me. And so I searched and searched and searched for someone who'd be able to translate the look I had in mind for my blog. 


Then I found her! The very creative Liz Barber of Sweet Simplicity Designs did a great job of giving Bake Happy a pretty make over. Head on over to her site to check out the wonderful blogs and designs she has created. She's very patient, giving me lots of options to work with until we found the right look I am aiming for the blog. 


I wanted a very clean, simple look, should scream "happy" and something that would wonderfully complement the posts I have in my blog and she has given me just that and more. Thanks Liz! It's a pleasure working with you. 


If you're reading this post through a reader or an e-mail alert, head on over and check out Bake Happy. I am pretty sure you will love it as much as I do. :)


Minggu, 20 November 2011

How to Make Vincent Van Gogh's Starry Starry Night Cake


For a shoot Bake Happy did recently [you can watch it here :)], I made a cake version of Vincent Van Gogh's Starry Starry Night. 
Unfortunately, it did not make the cut. So I thought of doing a proper post for it. Hmmm... let's kick it up a notch shall we? How about I show you how I made it? But let's kick it up a higher notch! If you scroll down below, you can see a video of exactly how the cake came to be. 

Now now... I am not a Van Gogh but I got the idea from Karen Tack and Alan Richardson's Hello Cupcake. It seems to be a very challenging project so In the book, their canvas are cupcakes but this post my canvas is a Lemon Raspberry Cake wtith Lemon Buttrcream Frosting covered in white marshmallow fondant. 

What we need:

Cake covered in fondant
6 grass tips (#133)
1 leaf tip (#66)
1 round tip (#4)
1 open stat tip (#17)
Buttercream in 9 colors (navy blue, electric blue, sky blue, forest green, mint green, electric green, golden yellow, lemon yellow, electric yellow)
Royal Icing
Large Tip (#855)

Here's how:

You can watch it here or you can look it up on Youtube because I can't seem to figure out how to make the video larger in size :)

Once the edible painting is done, using the royal icing and large tip to pipe a border to resemble a frame. 
As an option, you can brush some gold or silver luster dust on the frame to give the cake a authentic frame feel.
Hope you like it! 

Sabtu, 19 November 2011

How to Make a Typewriter Cupcake Topper

I am a NCIS fan. I have watched the whole series (whole 8 seasons, season 9 on-going) four times, excluding the times I catch the show on Fox and Jack (which is a lot) . I decorate cakes while watching the show which is kind of ironic and contradicting because cakes are all happy, cheery, endorphine enducing cute little things while I watch a show which investigates not so good events every episode. My favorite episode is the first one from season seven because I'm a girl and I'm rooting for Tony and Ziva. And also when Abby found evidence linking Gibbs to Paloma Reynosa. Then there's McGee who loves to his write his novels on a typewriter which got him into trouble because an obsessed fan used the typewriter ribbon to act out the not so good events of his soon to be published second novel. 

That intro took so long. I'm pretty sure you just scrolled down to get down to business. So here it is, a tutorial based on McGee's typewriter.

What we need:

Fondant in black, gray, white
Bronze luster dust
Fondant rolling pin
Small rolling pin or round chopsticks
Fondant smoother
Pasta stick
Knife
Brush
Water and Brush (to glue pieces together)


Here's How:

1. Roll gray fondant into a cylinder.

2. Using the fondant smoother, shape the fondant into a rectangular box.
3. Press the fondant rolling pin into one side.
It should now look like this
4. Cut the excess on the despressed end.
5. Press the higher end of the typewriter using the small rolling pin or chopsticks.
It's coming along nicely now, don't you think?
6. Using popsicle sticks, press it to the curved side to make space for the keys.
7. Roll a small amount fondant thinly and cut out the typewriter keys.
8. Paste the keys into the typewriter.
9. Cut up a rectangle out of the remaining white fondant.
10. Roll out a black fondant into a thin cylinder.
11. Fold the white fondant into the black cylinder and place on the higher end of the typewriter. Paint the typewriter keys with bronze luster dust to give it the "old-school" look.


Sabtu, 29 Oktober 2011

How to Make Vampire Bite Cupcakes

Still don't know what to give trick or treaters this Halloween? Whip up something easy and simple like this vampire bite cupcake.
What we need:
Cupcakes (Of course!)
Buttercream/Icing
Writing Gel (Red)

Here's How:
1. Using a large round tip, pipe buttercream onto the cupcake.
 I got this writing gel from Cooks Exchange in Glorietta. Perfect for Halloween.
 2. Using the writing gel, pipe the vampire bite. Pipe them like how you would write a comma "," 
 See? Super simple isn't it? :) So what will you be this Halloween?


Celebrate Bake Happy-ness!
Aikko