Selasa, 27 Maret 2012

Seven Up Guava Cupcakes with Peanut Butter Frosting


When I was a kid, a family friend taught my mom a simple recipe for mussels.
All you need to do buy a potfull of mussels (which are abundant in my hometown, Pangasinan) add 250ml of Seven Up and cook until the liquid dries out. Of course make sure to clean the mussels first. There isn't really a standard mussels to Seven Up ratio, just experiment on what works for you.


That first taste was heaven. Sweetness combined with that seafood taste that is unique to mussels. This dish is perfect as an appetizer or with a glass of beer to be shared with friends but I prefer it with rice and a glass of Coke. 


That's when I decided when I grow up, I would put up my own restaurant and all the dishes we'll serve will have one secret ingredient - you guessed right, Seven Up. I have that much faith on Seven Up. It's like the solution to all food concerns, thought the kid in me.
Anyway, now I don't have a restaurant as I have switched to dreaming of owning my own cupcakery. And no, it won't have Seven-Up as a secret ingredient to all the cupcakes (it won't be a secret anymore since I already declared it to the whole universe) I will sell but it wouldn't hurt to experiment on a recipe with it as the main star. And that was when Seven Up Guava Cupcakes with Peanut Butter Frosting was born. 


I adapted the recipe from Magnolia Bakery's Vanilla Cupcakes. Substituting the milk for Seven Up and cutting down on sugar by half a cup since Seven Up on own is sweet already. 


Do you have a recipe that calls for Seven Up? Care to share? Here's mine.
Seven Up Guava Cupcakes with Peanut Butter Frosting
350F
24 cupcakes

Ingredients

Cupcakes: (adapted from Magnolia Bakery's Vanilla Cupcakes)
2 3/4 cups all-purpose flour
3 1/2 teaspoon baking powder
1/2 tsp salt
1 cup (2 sticks) unsalted butter, softened
1 1/2 cups sugar
4 large eggs, at room temperature
1 cup Seven-up
1/2 cup guava jelly
1 teaspoon vanilla extract


Directions

(1) Cream butter and sugar
 (2) Add eggs one at a time
 (3) Combine all dry ingredients. 
 (4) Add the dry ingredients in 3 parts, alternating with the milk and vanilla
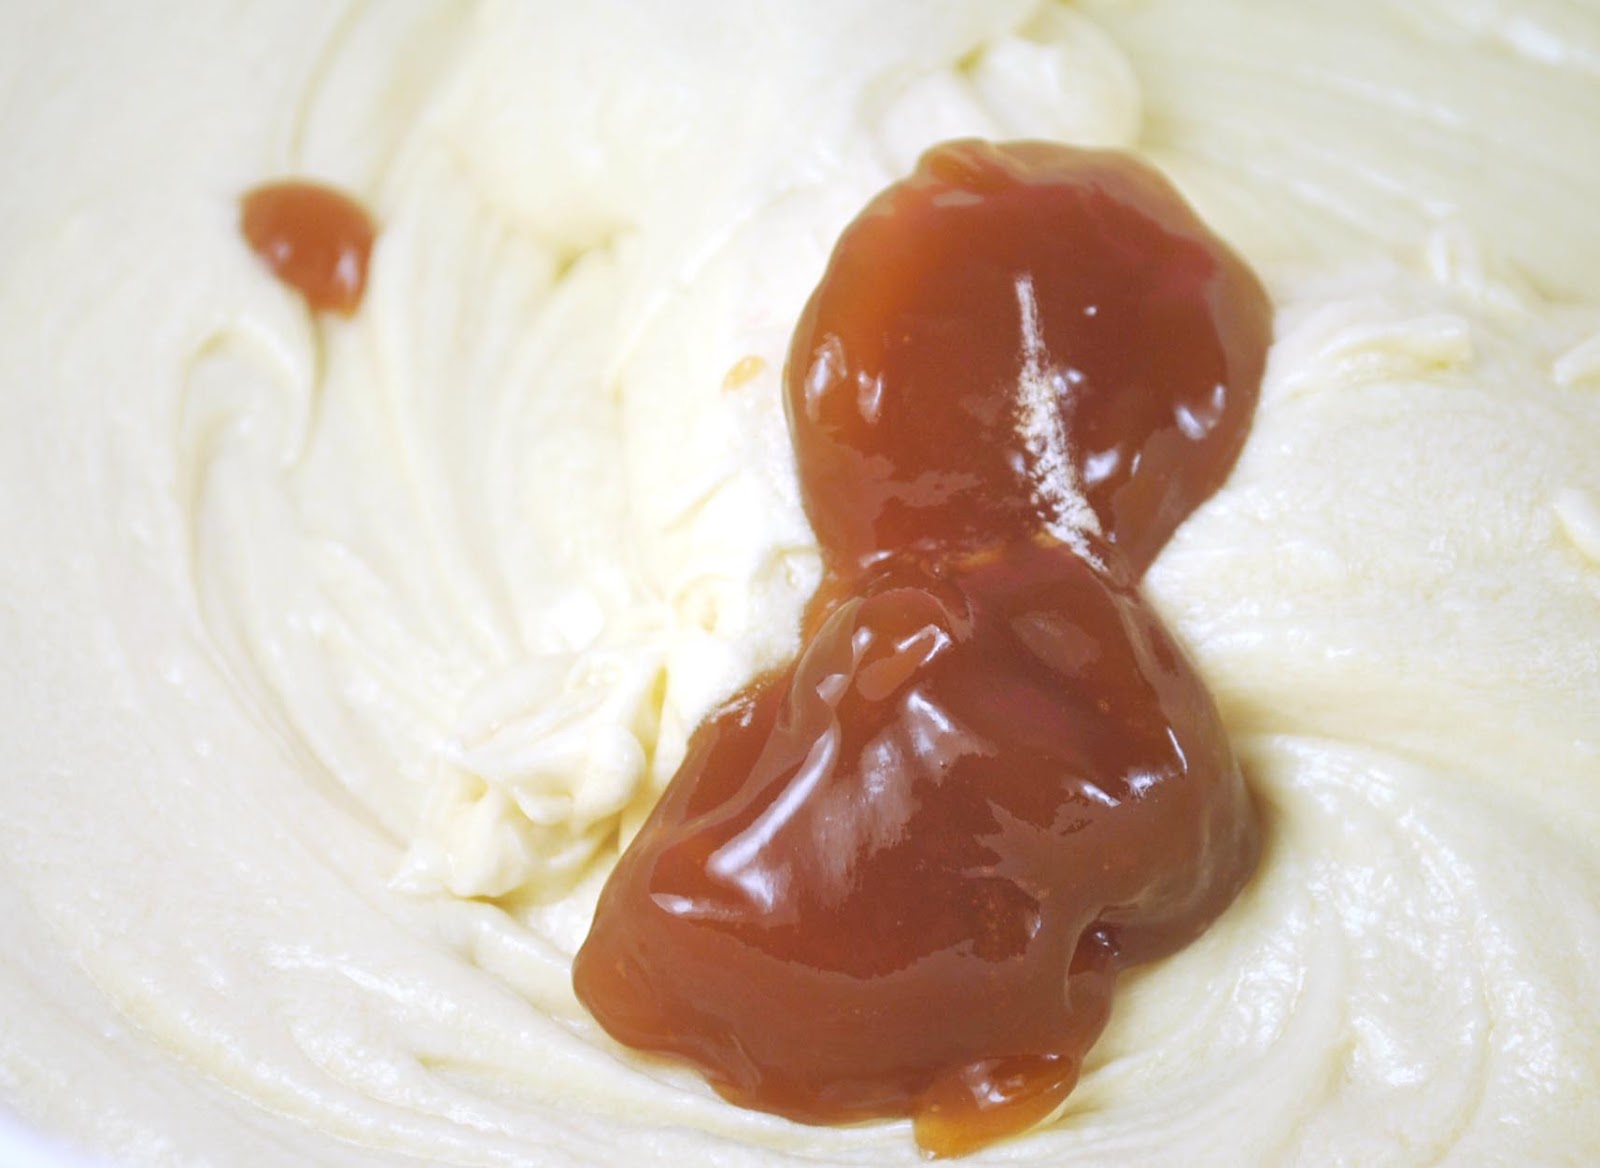
 (4) Fold in the guava jelly.
 (5) Carefully spoon the batter into the cupcake liners, filling them about 3/4 full. Bake for 20 to 25 minutes, or until a cake tester inserted into the center of the cupcake comes out clean.


Italian Meringue Buttercream
Makes 4 1/2 cups
from 
MarthaStewart.com

Ingredients
1 1/4 cups sugar
5 large egg whites
Pinch of cream of tartar
1 pound (4 sticks) unsalted butter, chilled
1 teaspoon pure vanilla extract


 Directions

(1) In a small saucepan over medium heat, bring sugar and 2/3 cup water to a boil. Continue boiling until syrup reaches 238 degrees on a candy thermometer (soft-ball stage).
(2) Meanwhile, place egg whites in the bowl of a standing mixer fitted with the whisk attachment, and beat on low speed until foamy. Add cream of tartar, and beat on medium-high speed until stiff but not dry; do not overbeat.
(3) With mixer running, add syrup to whites in a stream, beating on high speed until no longer steaming, about 3 minutes. Add butter bit by bit, beating until spreadable, 3 to 5 minutes; beat in vanilla. If icing curdles, keep beating until smooth.
 (4) For every 2 cups of Italian Buttercream, mix in 1/4 cup peanut butter. 
To jazz it up a bit, I grated dark chocolate over the frosting. Guess I can't stay away from chocolate after all.

Minggu, 25 Maret 2012

How to Make Leaning Tower of Pisa Cupcakes


Hey guys! Are you ready for another tutorial?
By the way, if you have any requests, leave a comment, say hi, or if you are my neighbor, just holler :) I have a few ideas up my sleeve but I'd like to hear from you also :)

After the Eiffel Tower Cupcakes Tutorial, I thought I'd make a tutorial of another famous landmark, The Leaning Tower of Pisa. I remember Cake Boss making a ginormous cake version of the tower with a couple riding a Vespa and I thought, hmmmm.... how about we make  a cupcake topper version?

I made this topper using the same technique as the Eiffel Tower Cupcakes, I call it the Google and Trace technique. You know, find an easy to copy clip art on Google, trace it on a tracing paper and transfer to gumpaste. Then following it up with details using royal icing. This technique works well if you have want to create a two dimensional topper like Eiffel and this one. I find this a very useful (and inexpensive too) technique since not all shapes are readily available as a fondant cutter. 

So here it is! hope you guys like it!

What we need

Cupcakes (of course!)
Buttercream in Electric Green (with some in a piping bag with a grass tip)
Leaning Tower of Pisa Template (I just googled "Eiffel Tower Clipcart" and copied the simplest image I can find and tranfered it to a tracing paper)
Knife
Gumpaste (I use Country Kitchen's Gumpaste Mix)
Royal Icing tinted Chocolate Brown in piping bag with a #1 tip
Slim popsicle sticks

Here's How:


(1) Using an offset spatula, spread some of the buttercream into the cupcakes. Make sure to just spread thinly as we'll be adding another layer first. Consider this a "primer coat"
(2) Pipe the grass on the cupcakes.
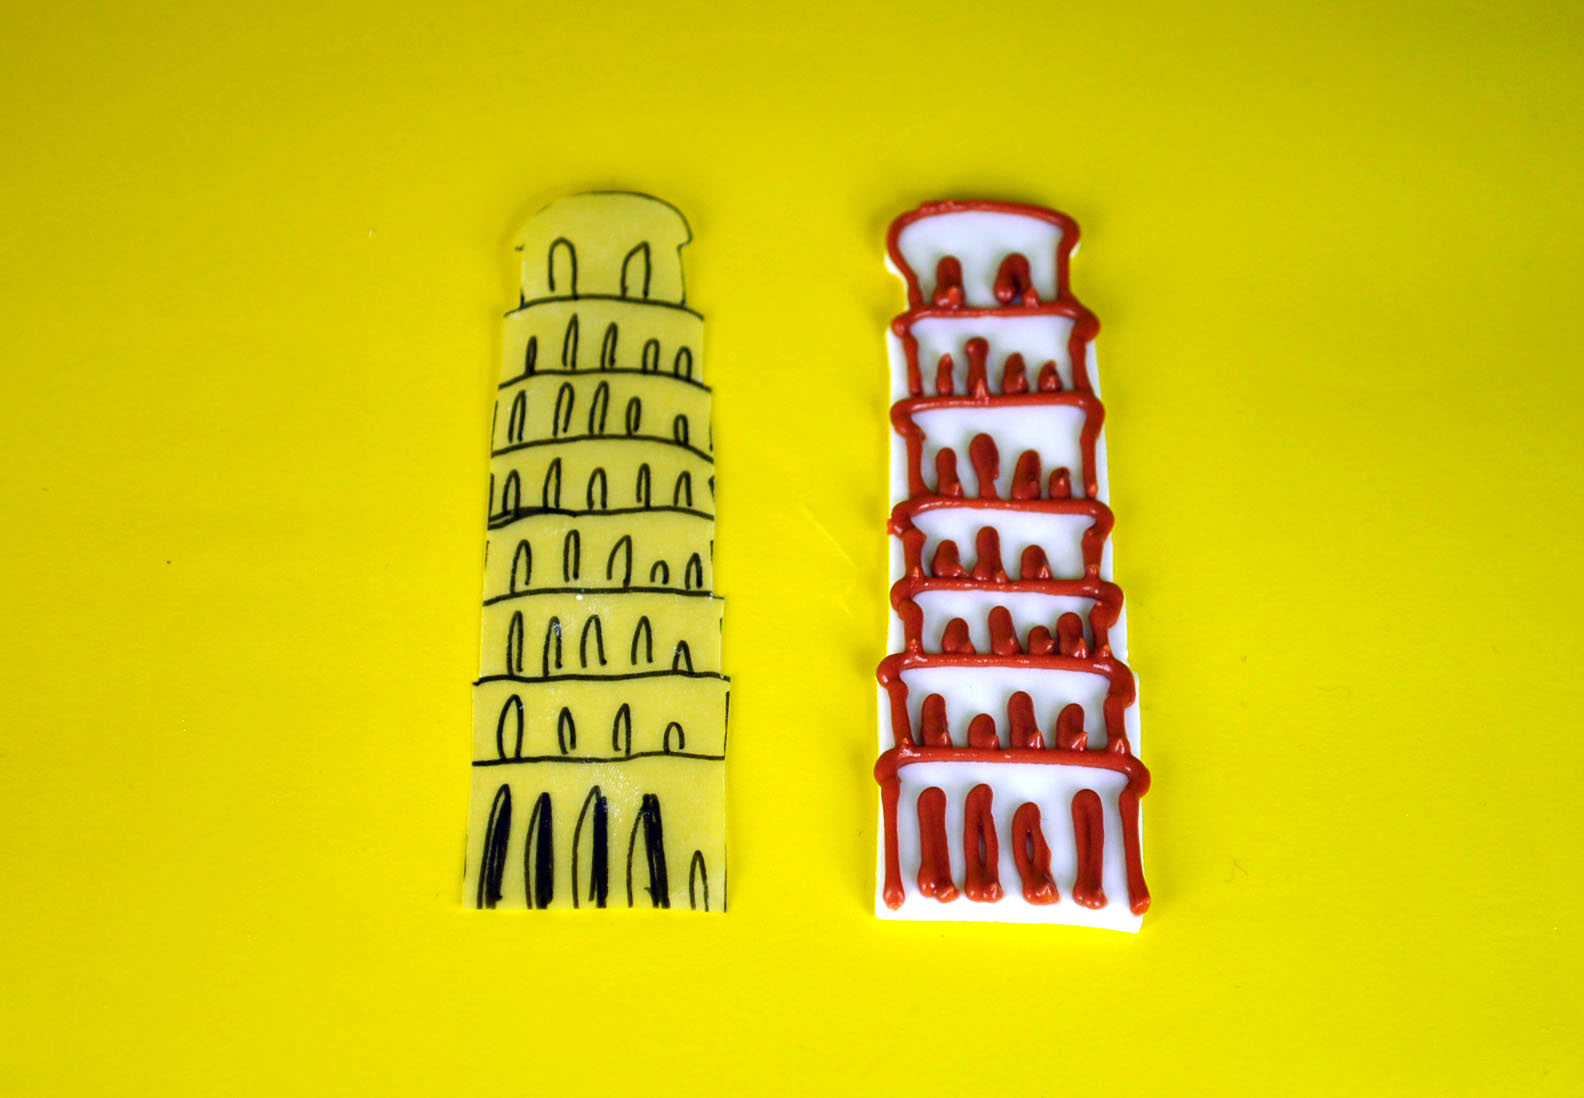
(3) Roll out gumpaste and cut out the Leaning Tower of Pisa(s) using the template. Let it dry overnight

(4) Here's the template I used along with the cut gumpaste version.
(5) Using the Royal Icing in piping bag with a #1 tip, pipe the outline of the tower
(6) Then proceed piping the inside details of the tower. Let it dry (... again) 
(7) Assemble towers on top of the cupcakes with popsicle sticks for support. Make sure to make the tower lean a little bit on the right. It wouldn't be the Leaning Tower of Pisa if it doesn't lean, yeah?

Kamis, 22 Maret 2012

Cupcake Decorating 101: Frosting - Butter or Shortening?


I got a lot of favorable response from the Cupcake Decorating Tips post I decided to follow it up with another interesting topic - when making buttercream, shall we use butter or shortening?
I have been asked many times so I thought I'd decicate a post about it. We won't be tackling the nutritional value of shortening or butter in this post but mainly pointing out the difference between butter and shortening in terms of cupcake decorating purposes.


Butter is roughly 80% milk fat, 18% water and 1-2% milk solids. It's basically made by churning cream or milk. Resulting butter has a pale yellow color. 
Vegetable shortening is 100% fat, snow white in color and doesn't require refrigeration.
Using the Basic Buttercream Recipe and a clear extract, let's see how butter and shortening will fare side by side. The following images will show buttercream made from purely butter (on the left) and purely shortening (on the left).


(1) Color
Buttercream made from purely butter will have a slightly yellowish tint while buttercream made from purely shortening will have a snow white color.
(2) Piped Frosting
When using butter, when piped into a cupcake it will look soft and heavy and will form a beautiful pointed soft tip on top once you release the frosting. When using shortening, piped frosting will be light and fluffy and will basically hold its shape. However, it will not form a beautiful pointed tip on top.
(3)  Tinted Frosting

When tinted with a hint of soft pink gel food coloring from Americolor, I'm not sure if you see it but the butter frosting has a slight yellowish tint bordering on orange while the shortening frosting shows a "just right" soft pink color. When using pure butter, you will probably have problems when using tints as pink (it might slightly look orange-y), red (will also look orange-y) and blue (it might look greenish) but you'll have no problem tinting it with yellow, purple orange or green. When using shortening, since your color base is purely white, any tint added will just pop out nicely.


If you ask me what I use, I always use 100% butter basically because I love the taste of butter. It adds a certain depth of buttery goodness to the frosting even when you layer it out with other flavors like lemon, mint, chocolate or cream cheese. But an advantage shortening has is that it heightens the flavor you put into it. Vanilla is more vanilla-y, lemon is more lemony or mint is more mintly without the buttery flavor getting in the way.

Now, this is a question I am always asked. How do I keep butter from melting especially that we live in the the always sunny Philippines?

There is a process called crusting. The longer a frosting sits, it will eventually form a crust or an "outer layer skin" that hardens and protects the rest of the frosting. So as long as I don't pipe my cupcakes very near an operating oven, frosted cupcakes should be fine. This has always worked for me. 

But if you're not particularly confident using purely butter, you can always try and experiment with a butter to shortening ratio that could work for you, 50% butter / 50% shortening, 25% butter / 75% shortening or 100% shortening. It's basically up to you. 

If you want to use pure butter but not quite confident that it'll hold it's shape especially during transporting cupcakes to your location, you can always add more powdered sugar (or if you don't wan't it too sweet - substitute it with powdered milk).

I'd love to know your thoughts on this. Are you a butter or shortening user? Or a combination of both? How do you keep your frosting sturdy till it reaches its destination?


Senin, 27 Februari 2012

A Friendly Reminder: Google Friend Connect


Good news and bad news.


Let's start with the bad one first. 
But before I share the bad news, here's a pretty picture of Mini Crab Quiche(s) which is totally not related to the below news. Just wanted to post something pretty to prep you guys up :)
So here it goes... ever since I started this blog, one of the things that fascinated me the most is the cool Blogger feature called "Google Friend Connect". Basically how it works is that you click on "Follow" on the Blogger tab if you want to follow a blog. 


And wow, I must have been saying some right, something funny, something noteworthy for you to follow my blog. And that is one of the things that keep me going. And for that, "Google Friend Connect" followers, I thank you for the bottom of my happy heart.


I recently found out that blogger is removing this feature effective March 1, 2012. This surprised me in a sad kind of way. I'm not sure why they are doing away with this but this means if you follow me through "Google Friend Connect", chances are beginning March 1, you won't be able to receive updates from me. 


But here's the good news!!!


Don't you worry, there are lots of ways to connect with Bake Happy!
See the nice looking rows of buttons on the upper right hand corner of my blog? Head on over to it and click one (or it would make me happy if you click and subscribe to all).


Bake Happy is currently on:

  • Facebook: aside from blog updates, this is where I post all cake orders (if you need a "cute cakes fix", then head on over. Outtakes (stuff that didn't make it to this blog), baking tips and Sunday lazy baking pictures are in Bake Happy's Facebook page, too.
  • Twitter: aside from blog updates, this is where you'll know if I am craving for sugar coated pili nuts, my everyday musings and my penchant for Shaider's Fushigi Shigi song, Clark Gable and Claudette Colbert's It Happened One Night and crime procedural dramas.
  • Pinterest: Oh, I have to work on this one but all tutorials are on my boards :)
  • E-mail: Got a question? A cake order? Just want to say, hi? Drop me a mail and let's het to know each other better. :)


So, let's celebrate two things today, (1) Social Media and (2) Bake Happy-ness!


ps. want the recipe for the Mini Crab Quiche from the photo above? If your answer is "yes of course!" ask me on Facebook, Twitter, Pinterest, through mail or comment below and I will definitely answer :)


Have a great day ahead everyone! 

Minggu, 26 Februari 2012

Chocolate Lover

This is the confectionery castle baking dreams are made of. 
How do I know of Chocolate Lover? I remember passing by their Quezon Avenue branch while still in college and use to wonder why a big chocolate colored castle is standing proudly in the middle of the metro. I mean, what is going on? Was I missing something? Will an Oompa Loompa greet me at the door while Willy Wonka wait for me by the Chocolate River? I was often tempted to stop and see what all the fuss is all about but I was not familiar with the area. Good thing a friend of mine from college filled me in on the secret. And no... sorry to tell you, no Oompa Loompas.


Anyway, fast forward to a few years later, when the baking bug hit me, I finally stepped into their Cubao branch. I tell you, my baking life was never the same. If want to start a baking business or want to take up baking as a hobby, you may want to visit Chocolate Lovers. Let me be your unofficial tour guide for your first visit. After that, you're on your own. Unless you want to invite me, I'd be happy to tag along.


Okay, just so I won't take the blame, here's the Bake Happy's friendly warning before we browse through the aisles: this place will make you dig real deep into the farthest recesses of your wallet... in pockets you never thought existed. With that out of the way, shall we?


Before, all packaging materials were on the second floor while all confectionary items were in the ground floor. They recently renovated The Castle and literally made it a one stop shop. All items are now on the first floor. 


Here are the packing materials. Boy there are lots of them!
Some D-I-Y cupcake towers available in 3 and 5 tiers. There are some plastic packaging too.
Can't get enough of sprinkles? [Like someone I know who buys them all the time even though she doesn't know where to use it yet. {That someone's defense: Hey, sprinkles are like visible version of endorphins, just looking at them makes everybody happy}]
But wait there's more!
How about some sanding sugar? These ones are used for sugar cookie decorating. Something like what glitters are to scrapbooks.
Lots of cocoa powder to choose from! One time, I was really clumsy and dropped a bag of Callebaut and the whole thing split open! I was sooo embarassed! I was fussing over the mess (wow I can still remember the intoxicating chocolate fragrance) and a nice lady approached me and told me not to fuss. I told her I'll pay of course (clumsy me) and she went on telling stories about how they use it to make champorado. Such a sweet old lady :)
Need some pans? You can find virtually anything here.
If you're mission is to add up to your collection (ummm, I mean investment) of tips, cutters and all sorts of cake decorating tools then this is the place to be. But I warn you, their stock flies out of the window fast. What you see there one week may be gone the next.
Did I mention well stocked?
I did mention well stocked? Yes? Yeah they are.
Here are some walnuts, cashew nuts, macadamia and all sorts of nuts. They say you are what you eat, so I try to stay away from these stuff. Just kidding.
Ahh... the confection The Castle is named after, chocolate.
Cool! Here are some pre-colored ones. I will buy some the minute I have the courage to make cake pops. I suck at making them. I wish I live next door to Bakerella

Candies in all forms, anyone?
Here's more!
Hope you enjoyed the tour everyone! Happy shopping!


Chocolate Lover Incorporated

Locations:


Main:
45 P.Tuazon Blvd. corner
C. Benites St. Cubao
Quezon City
Philippines 1109


Tel. numbers:
724 4964
724 5752
411 7474
email: info@achocolatelover.com


Branch:
2 Kitanlad St. corner
Quezon Avenue
7328576 / 7417487


Senin, 20 Februari 2012

Cupcake Decorating 101: Cupcake Decorating Tips


We're talking tips today. The cupcake decorating kind that is.You see, I just noticed that ir has been awhile since I followed up on the cupcake baking posts. I guess weve been caught up in cupcake tutorials, you and I.

So just in case, and this is me hoping, that my blog has recently been a favorite of yours,  head on over to the tutorials section for the past posts on cupcake baking. And while  you're at it do check the cupcake topper tutorials, I'm pretty sure you'll find one or two useful. But before you click on the tutorials link, please promise me youll come back to this post. Yeah?

Okay, so let's go back to this post's topic.  I thought I'd show you the decorating tips I usually use when frosting cupcakes and how they look like when piped. I buy all my tips from Cooks Exchange in Glorietta. Sadly, they are closed for the mall's renovation. But they still have branches in Rockwell and Megamall.  All are from Ateco.

 Here are some closed star tips.  Tip #855 is my all-time favorite one. You can see it used all over this blog. I love closed star tips because of the defined swirls they make. A smaller version is tip #846. Tip #854 has more "teeth" than the other two. 
Here is a batch of frosting I prepared so I can show you how they look like piped.

Don't they look pretty? See the well defined swirls? 
Now, here are some open star tips. While the closed star tips curve at the top, the open star tips are designed to have more frosting on the center, creating a more stable top for a cupcake. So, if you have a heavy cupcake topper, and you want swirls on your frosting, go for the open star tips instead of the closed ones. 
Here's how they look like piped. Swirls are less defined than the what the closed star tips create but are more stable
Lastly, if you want to go for simple effect, here are some plain round ones. Tips with numbers 809, 806 and 805 should be able to do the trick.
Here's how they look like on top of cupcakes. Oh wow! Just looking at these, I just realized (again), by using the round tips, the cupcake to frosting ratio is almost 1 is to 1! Sweet!
Hope this post helps you guys! More to come! :)