Tampilkan postingan dengan label fondant. Tampilkan semua postingan

Senin, 04 Juni 2012

How to Make Fondant Poodle Cupcakes


Have I ever told you about my pudgy hands? Not only are they pudgy, they're also small. The size of a CD. Not kidding. I mean, it doesn't come useful when I'm in front of a keyboard trying to type control+b or control+v with only one hand. Talk about awkward. 

But then again, I love my hands because no matter how pudgy they look, they helped me make these adorable poodles. If you have read my blog long enough, you'll recognize these from this post. In Bake Happy's Facebook page, there exists one, too. These poodles were also featured on National TV! But I wasn't able to catch it. Too bad.
And just in case you're wondering why I am suddenly talking about my hands, it's because I'm nervous! Because, you're about to see them. Why? Because I made a video tutorial. Just to let you know, this is just my third video, here's the first and second. Hopefully, I got better at it and not actually regressed. 


Bake Happy friends, I have a favor to ask. Please get used to my pudgy hands because from time to time, instead of the usual step by step pictures for tutorials, you'll be seeing my hands showing you how to make cupcake toppers. And when you I post a video tutorial, that's when you know I got too lazy to type instructions. 


And on to the tutorial we go:
Fondant Poodle Cupcakes


What we need - 


Fondant in white, black and ivory
Fondant rolling pin
Toothpick
Knife/offset spatula
Royal icing in a piping bag with #2 tip
Sprinkles (big hearts and small round white)
Ball tool
Small flower fondant cutter
Paste as glue/paste
Small brush for the water
Here's how:
 Want to see a bit of the behind the scenes? This is a camera I used to shoot the tutorial. Its attached to a very very very vintage tripod which I absolutely love. It's actually in between me and the fondant. Kinda awkward to move when I try to rely on the screen to see how I was doing but I hope I did okay.
And oh, by the way, instead of white, you can definitely try making pink or brown poodles. No matter what their colors are, poodles are absolutely adorable :)

Minggu, 25 Maret 2012

How to Make Leaning Tower of Pisa Cupcakes


Hey guys! Are you ready for another tutorial?
By the way, if you have any requests, leave a comment, say hi, or if you are my neighbor, just holler :) I have a few ideas up my sleeve but I'd like to hear from you also :)

After the Eiffel Tower Cupcakes Tutorial, I thought I'd make a tutorial of another famous landmark, The Leaning Tower of Pisa. I remember Cake Boss making a ginormous cake version of the tower with a couple riding a Vespa and I thought, hmmmm.... how about we make  a cupcake topper version?

I made this topper using the same technique as the Eiffel Tower Cupcakes, I call it the Google and Trace technique. You know, find an easy to copy clip art on Google, trace it on a tracing paper and transfer to gumpaste. Then following it up with details using royal icing. This technique works well if you have want to create a two dimensional topper like Eiffel and this one. I find this a very useful (and inexpensive too) technique since not all shapes are readily available as a fondant cutter. 

So here it is! hope you guys like it!

What we need

Cupcakes (of course!)
Buttercream in Electric Green (with some in a piping bag with a grass tip)
Leaning Tower of Pisa Template (I just googled "Eiffel Tower Clipcart" and copied the simplest image I can find and tranfered it to a tracing paper)
Knife
Gumpaste (I use Country Kitchen's Gumpaste Mix)
Royal Icing tinted Chocolate Brown in piping bag with a #1 tip
Slim popsicle sticks

Here's How:


(1) Using an offset spatula, spread some of the buttercream into the cupcakes. Make sure to just spread thinly as we'll be adding another layer first. Consider this a "primer coat"
(2) Pipe the grass on the cupcakes.
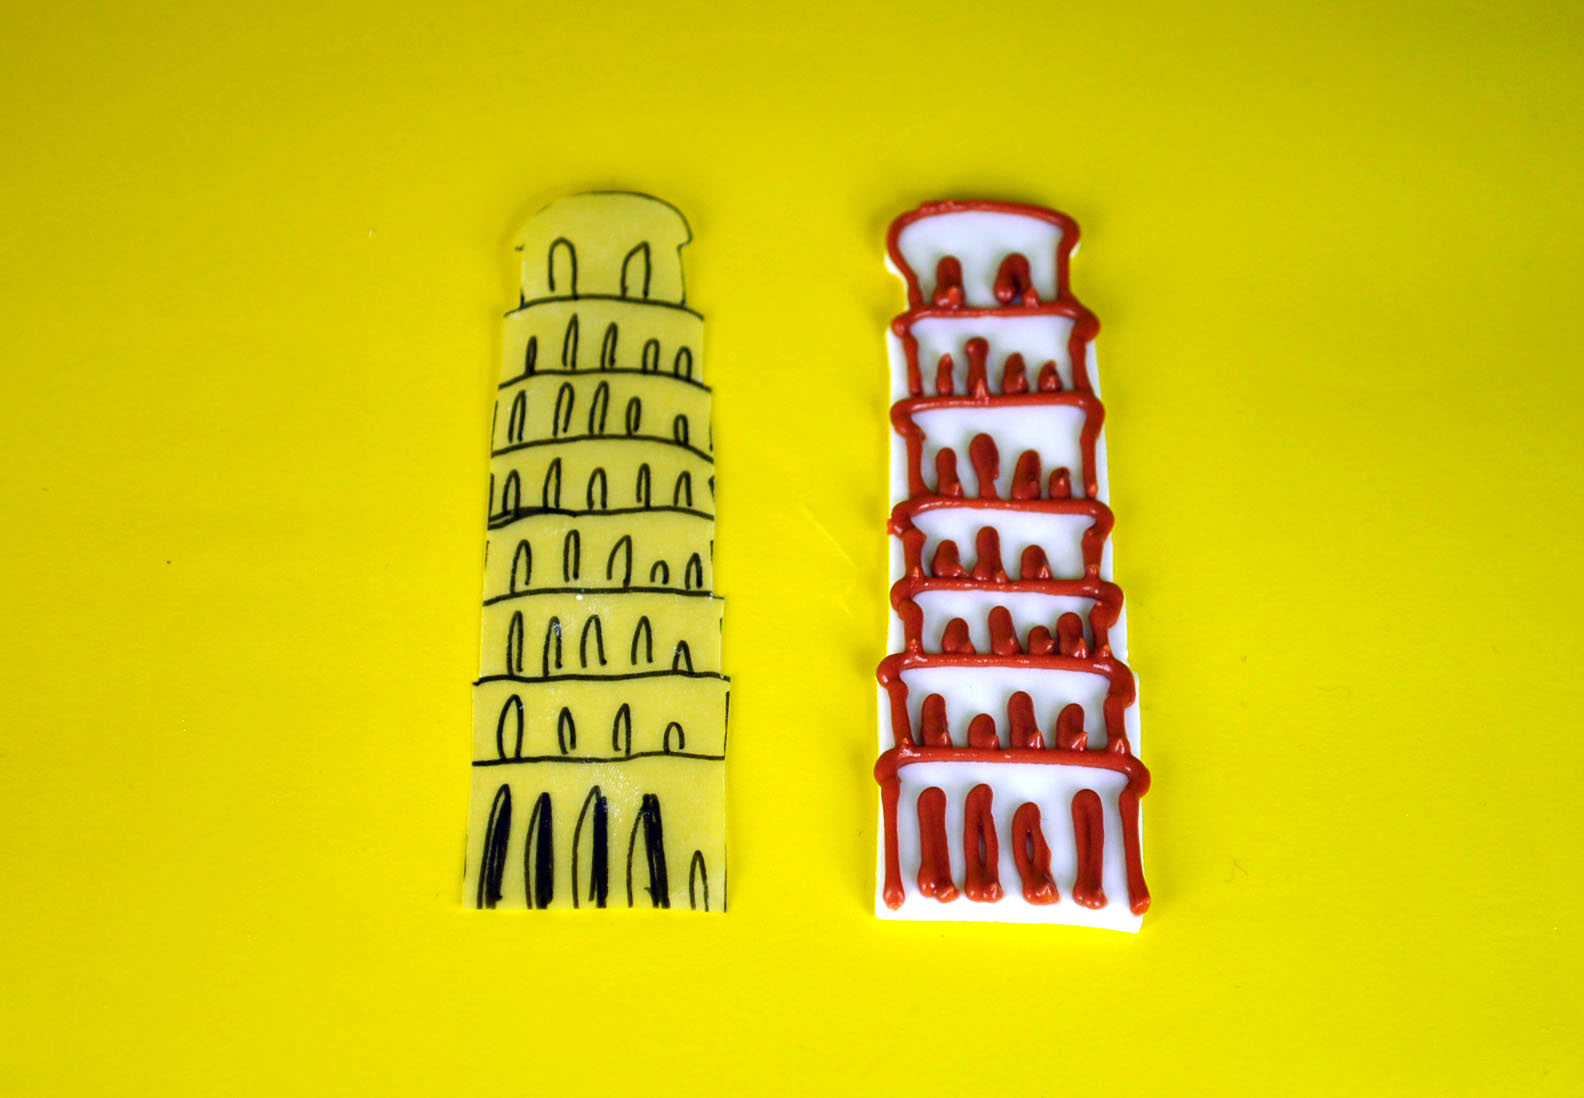
(3) Roll out gumpaste and cut out the Leaning Tower of Pisa(s) using the template. Let it dry overnight

(4) Here's the template I used along with the cut gumpaste version.
(5) Using the Royal Icing in piping bag with a #1 tip, pipe the outline of the tower
(6) Then proceed piping the inside details of the tower. Let it dry (... again) 
(7) Assemble towers on top of the cupcakes with popsicle sticks for support. Make sure to make the tower lean a little bit on the right. It wouldn't be the Leaning Tower of Pisa if it doesn't lean, yeah?

Kamis, 02 Februari 2012

How to Make Eiffel Tower Cupcake Toppers


February is the only month when it is unofficially okay to have pink as your picture background for every post for the rest of the month. By "you" I mean "me". And while where at it, I'll include April on the list since it's my birthday month and I can practically do anything I want. 
But then again, pink is a popular background for all my posts. I hope by now you're used to it, though I try to balance the whole vibe with other colors as well. Sometimes, you see browns, oranges, reds, greens, oh well, you get it. But pink is the closest to my heart. Just saying. 

Anyway, since it's the love month and all, I thought I'd show you how I made the Eiffel Tower Cupcakes from this post. And I'm posting it early to give you all the prep time you need. How's that for nice? :)
What we need

Eiffel Tower Image
Knife
Gumpaste (I use Country Kitchen's Gumpaste Mix)
Brown gel food coloring
Royal Icing in piping bag with a #1 tip
Bronze luster dust
Vodka [friendly note: vodka is used to thin out the luster dust and not for drinking while doing this project. After all, friends don't let friends cake decorate while drunk :)] or a clear extract (ex vanilla or lemon)
Brush
Slim popsicle sticks

Here's How:

(1) Roll out gumpaste and cut out the Eiffel Towers using the template. Let it dry overnight
 (2) Thin out brown food coloring with vodka and brush onto the towers. Let it dry for about 2 hours.
 (3) Using the Royal Icing in piping bag with a #1 tip, pipe the outline and details on the tower. Let it dry (... again) 
 (4) Thin out the bronze luster dust with vodka and brush onto the details.
 Here are some cupcakes I prepped with heart sprinkles. Cupcakes taste so much better with sprinkles, says Fancy Nancy. Oh wait, that was ice cream I think. Same difference. 
Assemble towers on top of the cupcakes with Popsicle sticks for support. Oh la la!!!

Sabtu, 21 Januari 2012

How to Make Dragon Cupcake Toppers

I'm a little time challenged this past week.
You see, all the clocks around the house stopped. At different times. One reads 3 o'clock, another reads 9:50 and another one 11:30. Must buy batteries soon. I don't know if I'm getting enough sleep or simply just been awake too long. I do hope I am not too late to welcome the Chinese New Year. Kung Hei Fat Choi everyone! 


2012 is said to be the Year of the Dragon. And in the spirit of fun, I looked up what's in store for Bake Happy (the blog, not the blogger) this year. Here's the 411:


Blog Name: Bake Happy
Birthday: July 12, 2008
Chinese Zodiac: Earth Rat


According to ChineseZodiac.com "Earth Rats prefer a sense of stability, digging in and putting down roots early to help ensure a successful future. They believe that slow and steady is the best approach." I like it!


So how will Bake Happy fare in 2012? Let's see
"Those people born in the Year of the Rat, will see considerable improvement in their energy and luck in the year of 2012 compared to 2011. Events will be smoother this year for all age groups. You will be lucky in love and romance, with even chances of being blessed with babies! It is also possible to settle down this year if you already haven’t. You will do well in business, career, social life, and romance too. However, take care not to indulge too much in the known vices and be cautious about gossip and vile words from others. Wise investments will bring in great harvest as your wealth luck is superb in 2012. Time to rejoice even more this year with favorable stars shining upon you!" 
Liking it better and better! 2012 seems to be Bake Happy's lucky year. I don't know about the romance stuff because... well, Bake Happy is a blog and it is just turning four this year. Practically a baby... so yeah.

And on to why I made this post. Let's make some Dragon Cupcake Toppers to usher in the Year of the Dragon.
What we need - 

Fondant in purple, orange, black and white
Fondant rolling pin
Medium sized oval fondant cutter 
Polvoron Shaper
Knife
Waste as glue/paste
Small brush for the water

 Here's how - 
(1) Roll out the orange fondant and cut out small triangles.
(2) Roll out the purple fondant and cut out an oval shape. Cut it into two. 
(3) Place it one on top of the other and cut the bottom part using the polvoron shaper. This will be the dragon's wings.
 (4) Cut out two small triangles for the dragon's ears.
 (5) Roll 6 balls using the purple fondant. The two big ones will be the head and body, the four small ones will be the hands and feet.
 (5) Shape the small balls to resemble tears.
 (6) For the head, shape it as well to resemble a tear but make sure the smaller end is still round.
(6) Do the same for the body but elongate the smaller end as it will become the tail. For the tail part, use a knife to cut out an arrow of some sort for the tail end.
 (7) Attached the head to the tail. Still doesn't look much but have faith :)
 (8) Attach the ears, hands and feet.
 (9) Attach the small orange triangles from head to tail as well as the wings.
(10) Finally, using toothpicks, the black and white fondant, make the dragon's cute face.
And with that, let's welcome the new year with these cute-as-can-be, soon-to-be-fire-breathing dragons!


Selasa, 16 Agustus 2011

WoW (White on White) Birthday Cake for Pammy

I made a White on White cake. Wanna see?
 This is for Pammy who celebrated her birthday last week.
 Pammy loves pink so I made "little Pammy's" dress pink.
I love making the little details. They make the biggest impact :)
 Still loving the pink blush!
Happy birthday, Pammy!!!

Happy Cupcaking, 
Aikko


Minggu, 09 Mei 2010

Happy Mother's Day!


I know I’m a day late. It was a busy weekend and I didn’t have time to post this. But as the Filipino saying goes: “Huli man at magaling, naihahabol din”.

So here’s the mother’s day cupcake for the 2 of the most wonderful moms in the whole world. I love you mama and mommy! Thank you for everything!

Happy Mother’s day to all the moms out there!

Happy cupcaking!
Aikko